User Interface
Overview
The Windchill Extension Framework provides the developer with ways of adding UIs to Windchill or adjusting the existing ones. Menu entries are the primary and most simple example of it, but most of the other aspects of the user interface can be edited through a Windchill Extension. All added UI elements can be localized.
There are two types of UI that can be implemented through a WEX:
- Windchill UI: an interface that looks and feels like the standard UI and is seamlessly integrated. It is not possible to tell the difference between one of these interfaces and an out-of-the-box one.
- Custom UI: a separate page which is using the Windchill UI but is built using other techniques such as using Bootstrap and JavaScript libraries.
It is important to read the Security section of this manual when implementing user interfaces.
Windchill UI
A Windchill UI is one that is developed using standard Windchill techniques such as the JCA framework.
Implementation Techniques
Adding a UI through Touch Points
A touch point is where Windchill looks in order to add a new element to its UI features; Menus, Tabs, Validators and Quick Links entries are examples of UI elements generated by this procedure. The injection of touch points into the system is managed via the definition.xml file and the WEX's localized resources. Some of the elements that can be added with this technique are the following:
Menus
The action model of Windchill allows the addition of new menus. There are two steps to this procedure:
- Add the action entry defining the XML action file location.
- Add the resource bundle entries.
Adding the Action Entry
Adding an action menu is done by inserting a line into the Windchill XML files that control the menu system. This is achieved by defining the action in the definition.xml file of the WEX, which will used to automatically make the menu changes when the extension is installed. The root tags are:
wex-definition -> install -> menus
Within this, the xml tag is added:
<extension menu="[xml tag]" file="[xml file]" action="[jsp location]" position="[position tag]"/>
An example would look like this:
<!-- Add a menu to the quick link -->
<extension menu="header actions" file="navigation-actionModels" action="wexAction"/>

<!-- Add a menu to the various objects -->
<extension menu="more parts actions" file="PartClient-actionmodels" action="wexAction"/>
<extension menu="epmdocuments details page actions" file="UwgmCadx-actionmodels" action="wexAction"/>
<extension menu="docs row actions toolbar" file="DocumentManagement-actionmodels" action="wexAction"/>
<extension menu="more change notice row actions" file="ChangeManagement-actionModels" action="wexAction"/>
<extension menu="promotion request row actions" file="PromotionRequest-actionModels" action="wexAction"/>
<extension menu="search_table_actions_toolbar" file="search-actionmodels" action="wexAction"/>
<extension menu="folderbrowser_toolbar_actions" file="FolderManagement-actionModels" action="wexRepEwexActionxport"/>
Action Models
The action model (e.g. menus) can be added to tables using the standard techniques in Java and specified in the definition.xml.
Example:
table.setActionModel("wex matrixcomp toolbar");
<menu name="wex matrixcomp toolbar">
    <action name="wexModeUsage"/>
    <action name="wexModeOcc"/>
    <action name="wexMatrixSettings"/>
    <action name="wexChangeAlign"/>
    <action name="wexShowUnchanged"/>
    <action name="wexHideUnchanged"/>
    <action name="separator" type="separator"/>
    <action name="exportTableXLSX"  type="object"/>
    <action name="exportTableCSV"   type="object"/>
    <action name="exportTableHTML"  type="object"/>
    <action name="exportTablePDF"   type="object"/>
</menu>
Command Actions
Command actions provide the ability to call a Java Class directly from a menu:
<install>
    <menus>
        <extension menu="more parts actions" file="PartClient-actionmodels" action="action-methods.example-command" position="SETSTATE"/>
    </menus>
    <actions>
        <command class="com.wincomplm.wex.kernel.impl.actions.WexActionMethods" method="execute" name="action-methods.example-command"  shortcut="false"/>
    </actions>
</install>
Note the action is a declaration of a method that must be defined as a Feature as it follows:
@WexComponent(uid = "action-methods", description = "Example Actions")
public class ExampleActionMethods {

@WexActionMethod("example-command")
public static FormResult exampleCommand(NmCommandBean ncb) throws Exception {}
Adding the Resource Bundle Entries
The resource bundle must be defined as follows:
    @RBEntry("Hello World")
    public static final String C0 = "com.acme.wex.example.wexAction.description";
    @RBEntry("Hello World")
    public static final String C1 = "com.acme.wex.example.wexAction.description";
    @RBEntry("Hello World")
    public static final String C2 = "com.acme.wex.example.wexAction.description";
Tabs
The action model can also add tabs using this meta tag:
<extension menu="general" file="infoPage-actionmodels" action="wexActionName" position="SETSTATE"/>
and this action for a new tab:
<page name="wexActionName" url="wexActionName"/>
Validators
All menu and tab actions can have validators that control visibility. It uses the @WexValidator annotation that takes an array of actions. Given this action in the meta:
<extension menu="xxxx" file="xxx" action="wexActionName"/>
The code for the validator would go as follows:
@WexValidator({"wexActionName"})
@WexComponent(uid = "wex-example.validator", description = "Example Validator")
public class WexActionValidator extends DefaultUIComponentValidator {

    @Override
    public UIValidationStatus preValidateAction(UIValidationKey uivk, UIValidationCriteria uivc) {
        UIValidationStatus displayStatus = super.preValidateAction(uivk, uivc);
        if (hide==true) {
            return UIValidationStatus.HIDDEN;
        }
        return displayStatus;
    }
}
Note: there is a class to extend from that will implement an action only for admin users:
com.wincomplm.wex.ui.commons.validators.WexAdminUIValidator
The wt-ui-commons module provides the necessary imports for all of this to work.
<dependency>
    <groupId>com.wincomplm</groupId>
    <artifactId>wt-ui-commons</artifactId>
</dependency>
Adding a UI through JSP
Wizards
Wizards are pop-ups prompted up by Windchill that are often comprised of multiple steps:
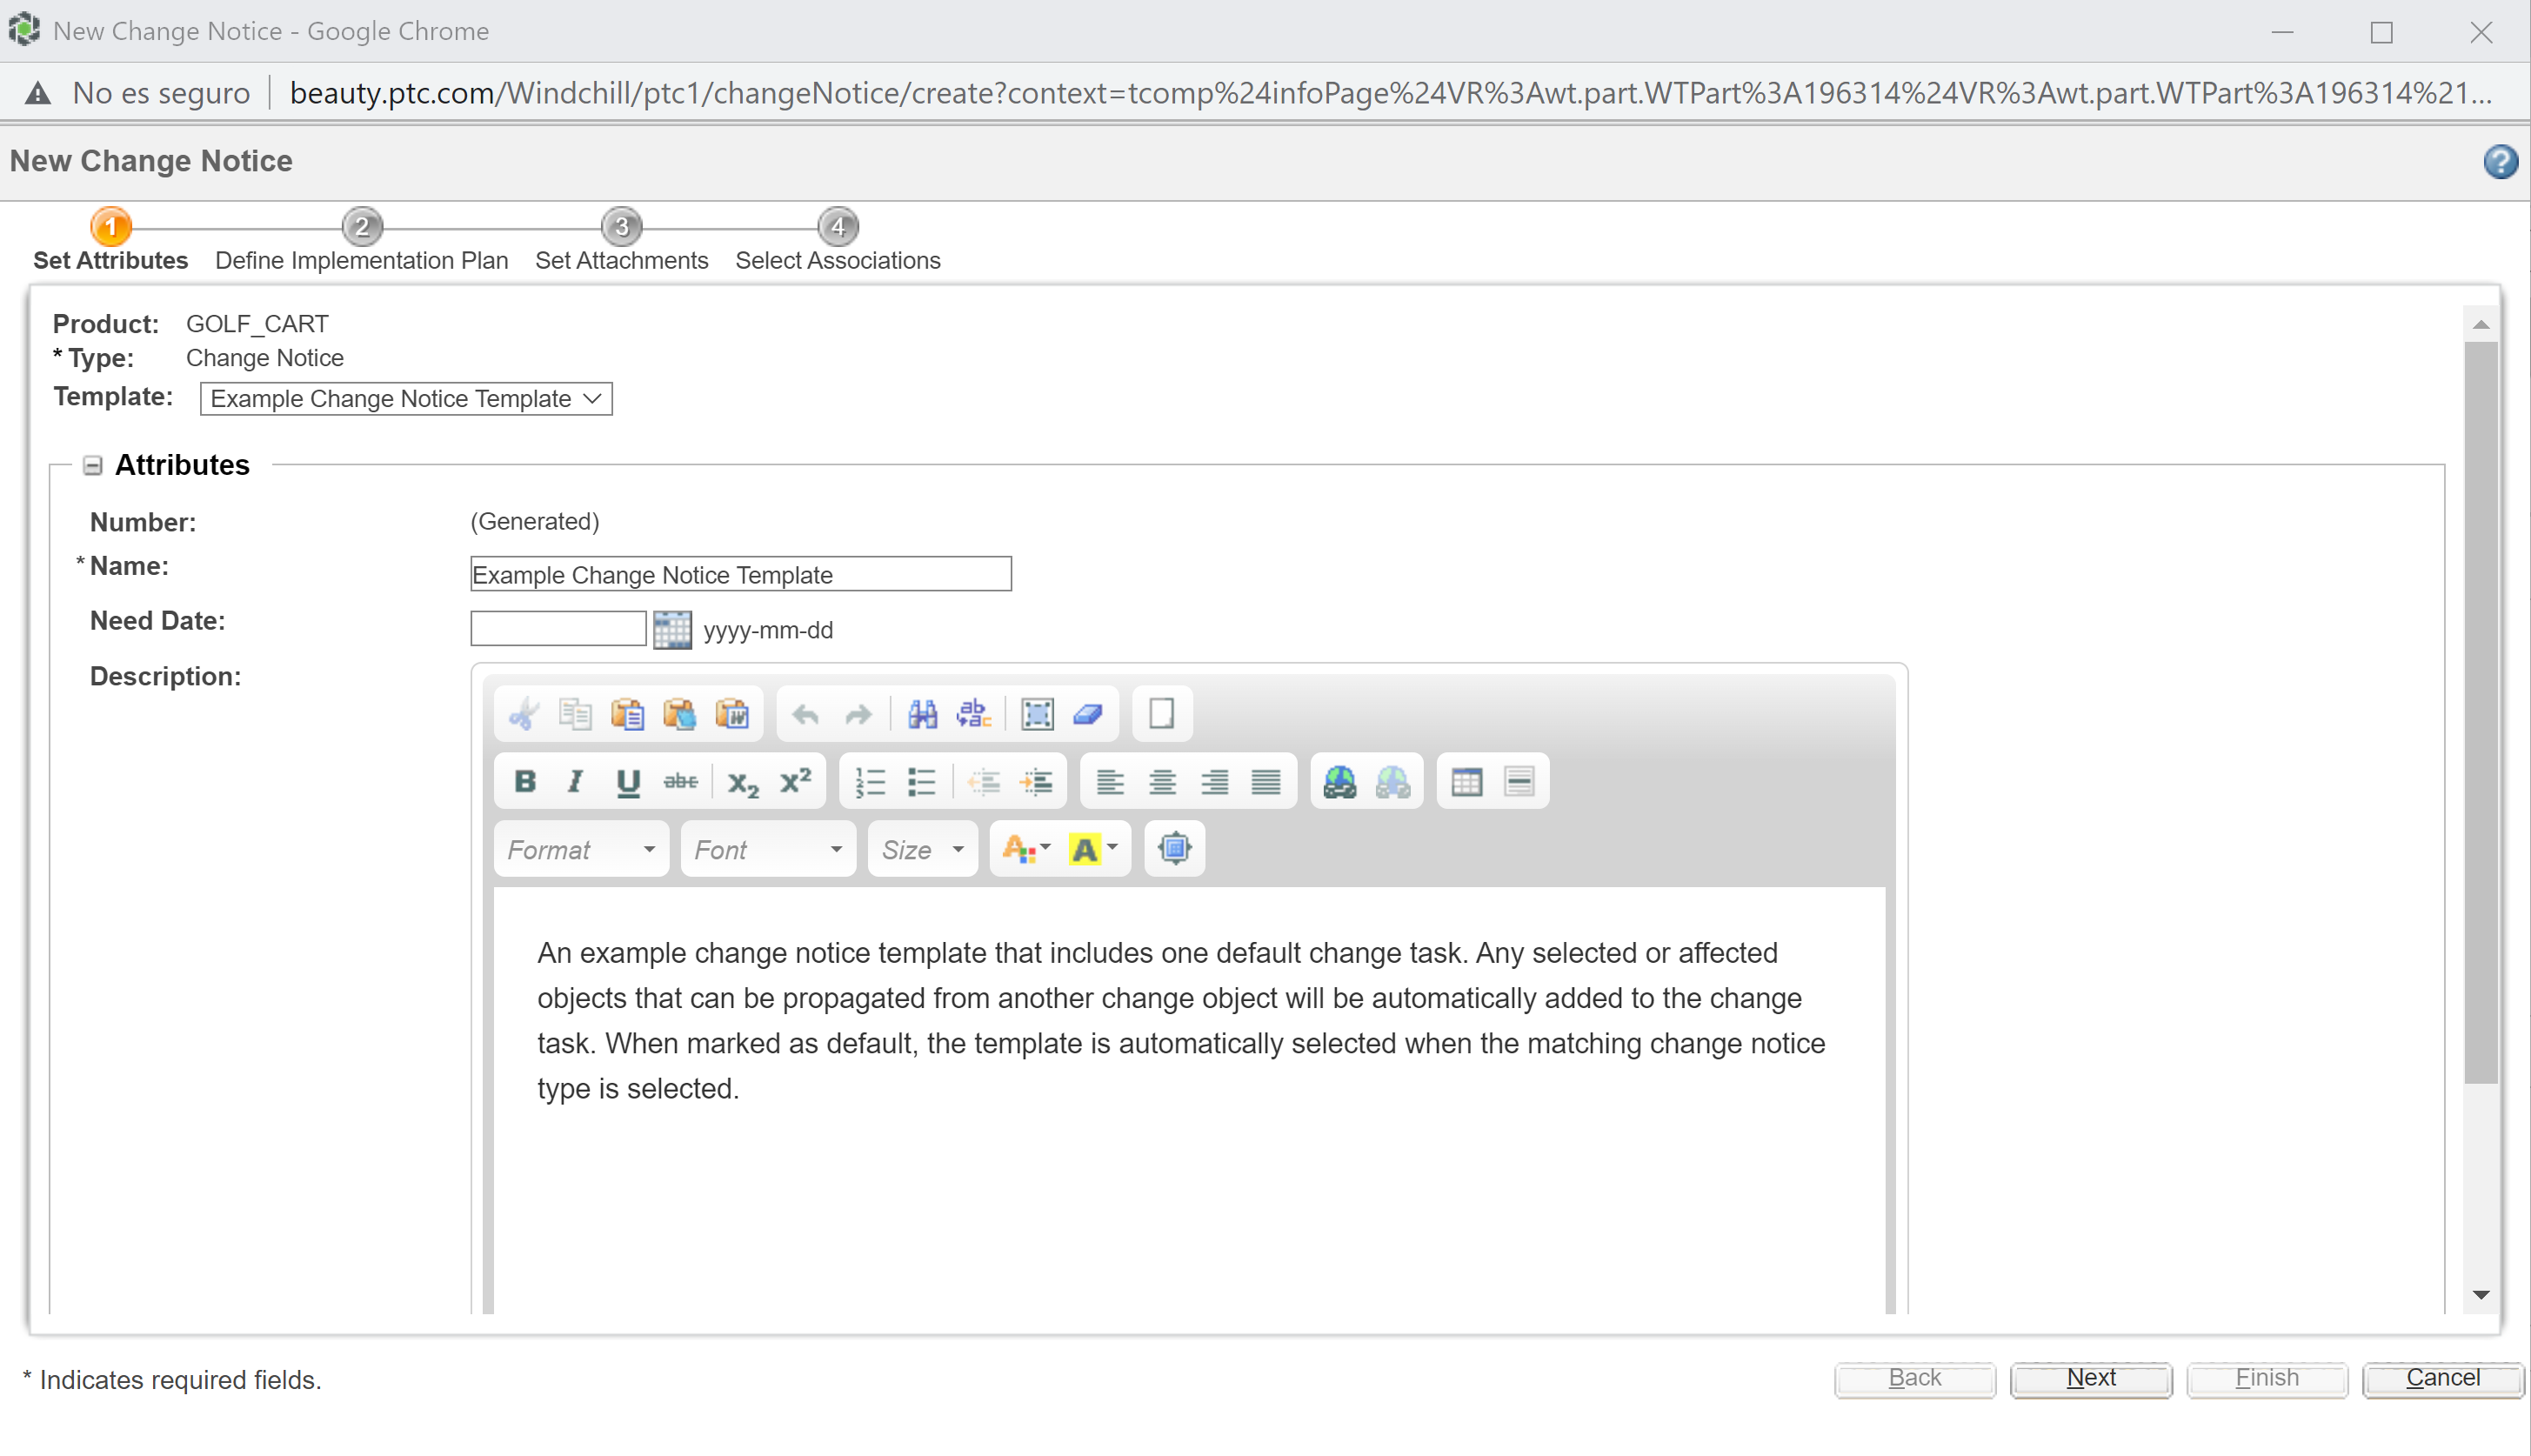
These are a combination of definition.xml file changes and JSP files which include beans and can also include WexInvoker.invoke commands. This guide includes an example on Wizards that sheds some light on the fundamentals of their code.
Tables
A table uses all standard JCA table techniques, but is created as a component. There are two elements to it: the JSP file, and the implementing Java code.
The JSP is as follows:
<%@ include file="/netmarkets/jsp/util/begin.jspf"%>
<%@ taglib uri="http://www.ptc.com/windchill/taglib/mvc" prefix="mvc"%>
<%@ taglib uri="http://www.ptc.com/windchill/taglib/fmt" prefix="fmt"%>
<%@ taglib uri="http://www.ptc.com/windchill/taglib/wrappers" prefix="w" %>
<%@ taglib uri="http://java.sun.com/jsp/jstl/core" prefix="c" %>

<jsp:include page="${mvc:getComponentURL('com.wincomplm.example.reporttable')}"/>
<%@ include file="/netmarkets/jsp/util/end.jspf"%
and the implementing code goes like this:
@WexBean("com.wincomplm.report.designer.reporttable")
@WexComponent(uid = "com.wincomplm.report.designer.reporttable", description = "Report Table")
@ComponentBuilder("com.wincomplm.report.designer.reporttable")
public class ReportTableBuilder extends AbstractConfigurableTableBuilder {
...
}
Within the table, a POJO is used as the data source for the rows.
These methods, that are accessed by the definition, use reflection to obtain the getter:
addColumn(factory, "data"... => public String getData() {
The methods can return Strings but also complex objects such as IconComponent and other elements that extend the com.ptc.core.components.rendering.guicomponents.HTMLGuiComponent class. These fields can also be collected together using the GUIComponentArray object.
Trees
Windchill supports Trees in a similar way that it does with Tables:
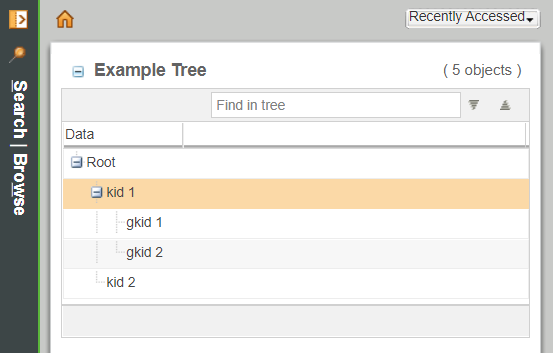
The data provider must implement AbstractConfigurableTableBuilder, which in turn uses a TreeHandlerAdapter to return the data from buildComponentData.
Data Utilities
The Data Utility gives a custom table access to data that is not defined in OOTB Windchill. We suggest developers are familiar with the Carambola examples that come with Windchill.
Implementation
@WexDataUtility("wex-example-tree-data")
@WexComponent(uid = "wex-example-tree-data", description = "Data")
public class ExampleDataUtil extends AbstractDataUtility {
    @Override
    public Object getDataValue(String string, Object o, ModelContext mc) throws WTException {
        if (!(o instanceof WexTreeRow)) {
            return null;
        }
        return ((WexTreeRow) o).getData();
    }
}
Performance
The Data Utility must be implemented with minimal impact on UI performance. As a utility may be called 1000s of times in the display of 1 page, we must have a highly performant algorithm. Consider that even a 10ms delay, such as the one added by a fast query, would become a 2s one if said query is run 2000 times in the display of the page. Therefore, we must either avoid queries or cache the result in a persistent cache to ensure multiple duplicate queries are not run.
It is encouraged to use extension performance throttles in the case the utility may be unduly affected by poor performance of an underlying asset, such as a database.
Localization
Windchill supports 12 languages, so we can build our extension to support one or more of these languages. In order to do this, we need to use localized Resource Bundles.
Beans
The bean must be defined
<wex:bean id="[beanid]" packageId="[groupid].[artifactid]" featureId="[featureid]">
Code
@WexComponent(uid = "[featureid]", description = "[description]")
See Example UI
Menus
Menus localization is done by adding a localized version of the Resource Bundle. An example would look like the one below:
@WexComponent(uid = "com.wincomplm.wex.example.ui.resources.WexResources", description = "Resource bundle")
@RBUUID("com.wincomplm.wex.example.ui.resources.WexResources")
@WexLocale(WexLanguage.FRENCH)
@RBNameException
public class WexResources_fr extends WTListResourceBundle {

    @RBEntry("French Example Menu")
    public static final String P1 = "com.wincomplm.wex.example.ui.edkHelloWorld.description";
    @RBEntry("French Example Menu")
    public static final String P2 = "com.wincomplm.wex.example.ui.edkHelloWorld.tooltip";
    @RBEntry("French Example Menu")
    public static final String P3 = "com.wincomplm.wex.example.ui.edkHelloWorld.activetooltip";
UI Text
We can get the Resource Bundle as follows:
ResourceBundle.getBundle("com.wincomplm.wex.kernel.resources.WexResources", WTContext.getContext().getLocale());
The wexid is in the key:
resourceBundle.getString(wexid + "." + key);
To do this, a helper class can be coded to access the RBs:
package com.wincomplm.wex.manager.resources;

import java.util.ResourceBundle;
import wt.util.WTContext;

public class RBHelper {

    private static ResourceBundle resourceBundle;
    private static String id = "com.wincomplm.wex.manager";


    public RBHelper() {
         resourceBundle = ResourceBundle.getBundle("com.wincomplm.wex.kernel.resources.WexResources", WTContext.getContext().getLocale());
    }
    public String getRbString(String key) {
        return resourceBundle.getString(id + "." + key);
    }

}
The helper would be used like this:
rbHelper=new RBHelper();
table.setLabel(rbHelper.getRbString("table.header.installedexts"));
Others
Localization does not only refer to languages: we need to manage times, dates, number, currencies (even though rarely used in PLM), etc.
The Windchill API provides support for determining the locale. Some date localization can be managed by using a format that is year/month/day, which is viable for the European and US locales and has the added advantage of being more easily sorted.
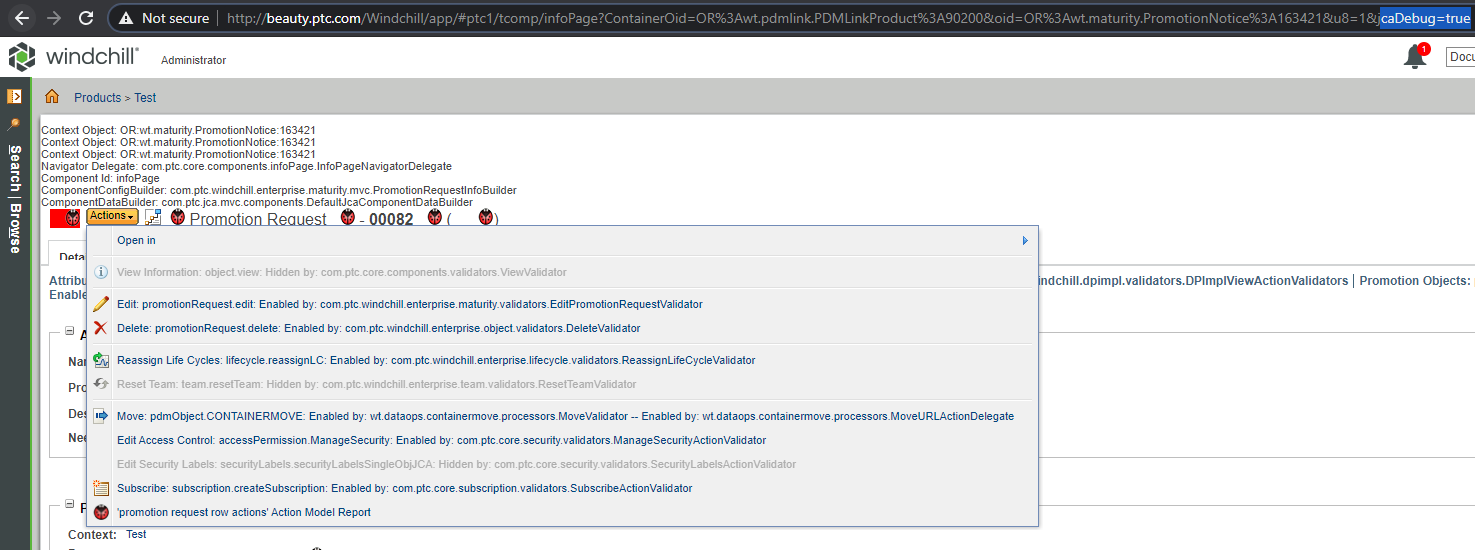
Debugging the Windchill UI
The jcaDebug parameter can be added to the URL to get a better look at the source of the elements present in the UI. It is helpful to know if an element is already there but being hidden by a Validator or to find out which class is generating a certain menu entry, among many other purposes.
Resizing
Windchill does offer some window size management but another technique is including this code within the page:
<script>
    window.resizeTo(550,340);
</script>
This is useful to ensure that a page with elements is always scaled to an exact size.
Custom User UI
This is a stand alone JSP that is coded independently of Windchill but call Windchill APIs.
Using CSS and JavaScript
We can include CSS and JavaScript resources in our page, but we cannot place them in the jsp area as this is not valid and on some secure servers these resources will not load.
The correct locations for them are:
codebase\netmarkets\javascript\com\wincomplm\wex\documentation
codebase\netmarkets\css\com\wincomplm\wex\documentation
To ensure the extension installer places your resources in the correct location, you must add these folders to your WEX's file structure:

This example will help you to access those resources from a JSP file:
<%@ page import="javax.servlet.http.HttpUtils"%>
<%
    String urlpath = request.getRequestURI(); // Get the full URL
    urlpath=urlpath.substring(0,request.getRequestURI().lastIndexOf("/")); // Shorten
    String jspath =  urlpath.replace("/jsp/","/javascript/"); // Adjust to new paths
    String csspath = urlpath.replace("/jsp/","/css/");
%>
<script src="<%=jspath%>/bootstrap-4.5.2.min.js"></script>
<script type="text/javascript" src="<%=jspath%>/jquery-3.5.1.min.js"></script>
Please ensure you use the latest versions of the resources and verify them against the NIST database for security reports.
Console Errors and jQuery
jQuery is a universally used library and it is already included in Windchill, but developers may wish to include a later version; in this case, console errors might occur. The following call can be used to mitigate these:
jQuery.noConflict();
Build Techniques
Building user interfaces requires a knowledge of the JSP engine that is being used in Windchill to render the UI, and also a good understanding of how browser caching works.
Preventing JSP Caching
All modern browsers cache requests that are identical as ones that have been previously made. When loading fast changing JavaScript and CSS, this can mean the deployment of a new extension with new resource will not function correctly if a previous version was installed and accessed with the same browser: this is because the resource may have changed but the browser is not aware of that, and will use its cached version as opposed to the newer resource now available, which will cause unpredictable behavior for the user.
In order to prevent this, we need an index that is unique to this build to be added to the URL so that the browser will reload resources on a new build deployment.
Implementation
This video illustrates the technique we use to prevent the browser from inappropriately caching newer versions of a resource.
We can use the following to replace a token in the JSP:
<plugin>
<groupId>com.google.code.maven-replacer-plugin</groupId>
<artifactId>replacer</artifactId>
<version>1.5.3</version>
<executions>
<execution>
<phase>prepare-package</phase>
<goals>
<goal>replace</goal>
</goals>
</execution>
</executions>
<configuration>
<file>src\main\wex\jsp\jspf\pindex.jspf</file>
<replacements>
<replacement>
<token>\?[1-9][0-9]*</token>
<value>?${maven.build.timestamp}</value>
</replacement>
</replacements>
</configuration>
</plugin>
The code is as follows:
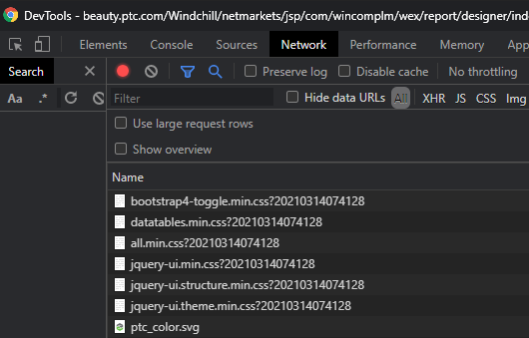
<% final String PINDEX = "?20210314074128"; // <- number will be replaced by pom plugin %>
And used as follows:
<script src="js/notifications.js<%=PINDEX%>"></script>
In order to check the effectivity of this technique, we can use the Developer Tools (F12) in the browser and check the network to ensure the URLs have the new index.
Unauthenticated Pages in Windchill
This is the method for a developer to allow an unauthenticated JSP to be added to Windchill.
In order to access Windchill through a WEX without authentication, the developer needs to:
- Create your JSP under an anonymous resource set in
$WT_HOME\HTTPServer\conf\app-Windchill-AuthRes.xml. - Use an admin switcher at the receiving end of the invoke call.
- Access the JSP through the correct URL for the previous example.