DevOps
Introduction
In an effort to automate and standardize build and delivery processes of Windchill Extensions, Wincom clients can perform these through a combination of Azure Pipelines (for the build part) and SharePoint download links (for delivery).
What are Azure Pipelines?
"Azure Pipelines automatically builds and tests code projects to make them available to others. It works with just about any language or project type. Azure Pipelines combines continuous integration (CI) and continuous delivery (CD) to test and build your code and ship it to any target."
Implementation
To use Wincom's Azure pipelines, you can follow this link. Depending on the Extension or pack of WEXes you're going to deliver to a client, you will have to either use an existent pipeline or create a new one.
Creating a New Pipeline:
In order to build a wex through a pipeline we need:
-
Prepare a 'build pack', which must contain:
-
A copy of this folder.
-
The WEX (or WEXes) we intend to build.
-
A copy of this folder (if we're going to obfuscate the classes).
-
Previous step must be checked into the Version Control System.
-
Log into Azure, select the corresponding 'Project' and click in the
 icon.
icon. -
Click the 'New pipeline' button
 located at the top-right corner.
 -
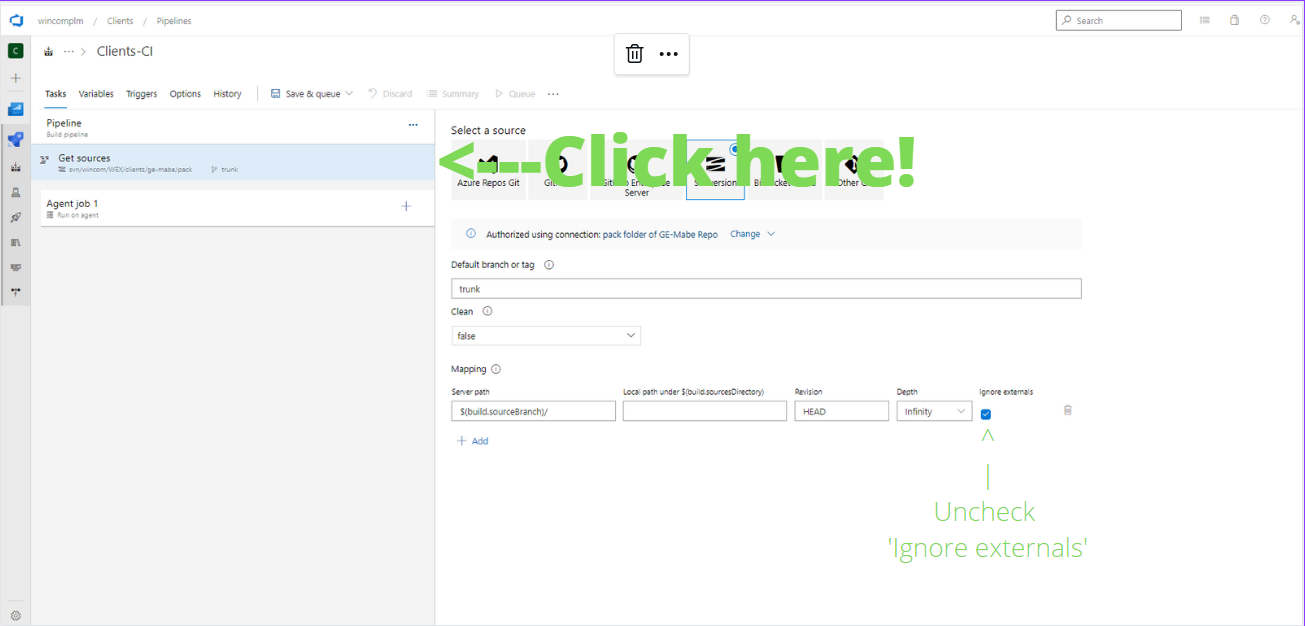
Select the Version Control System where the 'build pack' is stored.
5.1. 'Add' a new or 'Select' a previously configured connection to the 'build pack'.
5.2. 'Start with an Empty job'
Note: If the 'build pack' is stored in Subversion, make sure to 'uncheck' the 'Ignore externals' option as seen below.
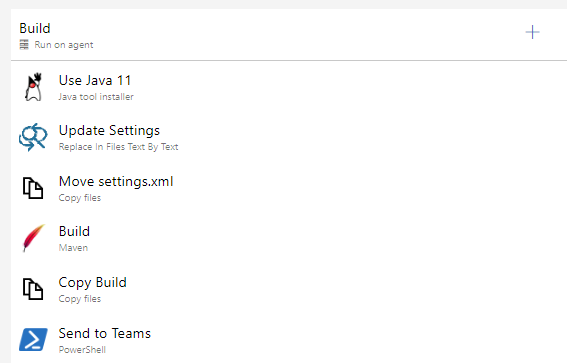
5.3. A pipeline used for building a WEX has 5 common tasks:
Note: If the 'build pack' is stored in a VCS other than Subversion, you'll need to write the build steps in a '.yaml' file.
-
Java tool installer.
-
Replace in Files Text By Text
-
Copy files
-
Maven
-
Copy Files
-
PowerShell
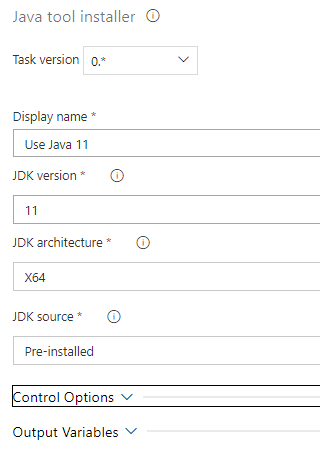
Java Tool Installer
Used for installing Java in the Azure VM Agent, and sets the JAVA_HOME environment variable.
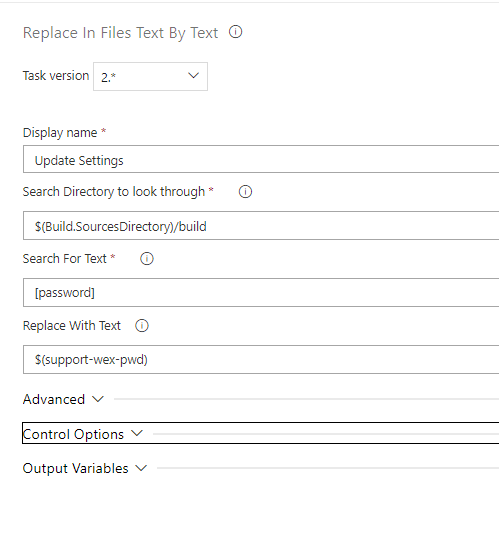
Replace in Files Text By Text
The file settings.xml included in the 'build' folder inside the 'build pack' contains the string "[password]" and this task will assist us in replacing it to the correct password in order to be able to authenticate to Nexus and access any dependencies that might be needed.
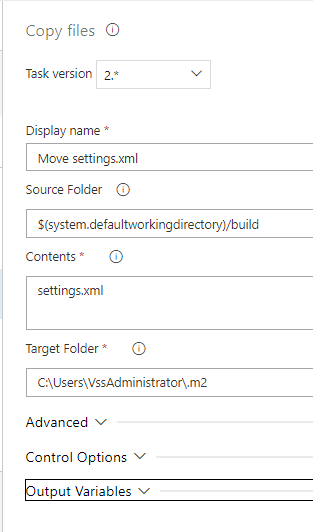
Copy Files
This task will move the 'changed' copy of settings.xml to the Azure's VM agent '.m2' directory.
Maven
This task is in charge of running the 'clean install' Maven goal using the pom.xml file as a reference to the dependencies and plugins needed to build it. This return a '.wex' file that can be installed in the desired Windchill system, whose version is specified through the wcversion parameter.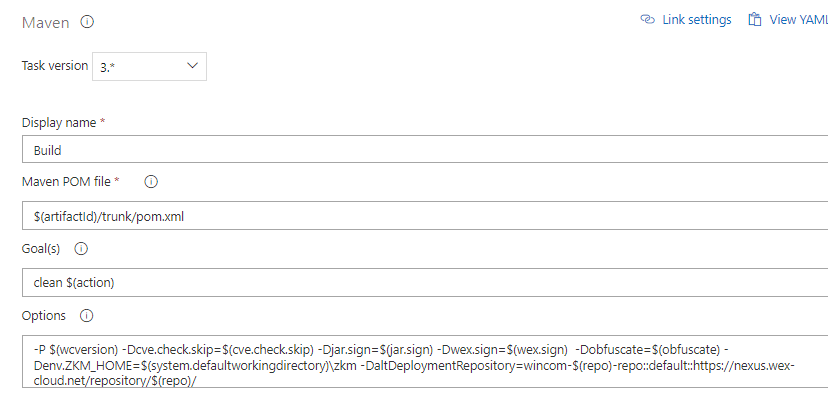
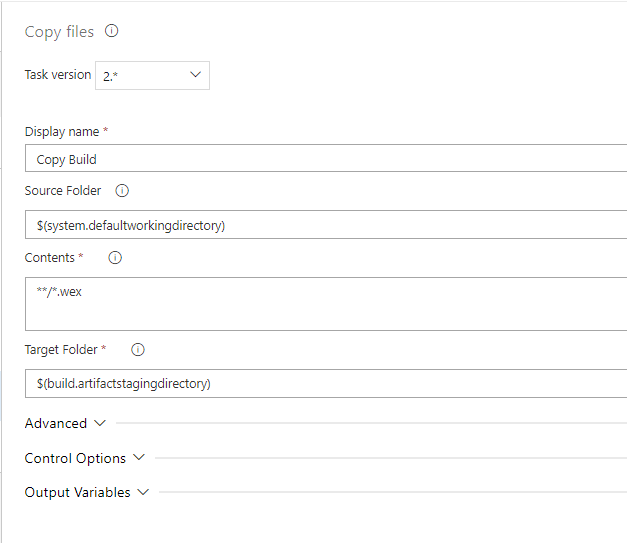
Copy Files
This task will help us with moving the resulting WEX from the Azure's VM agent default working directory to the staging directory of the same VM.
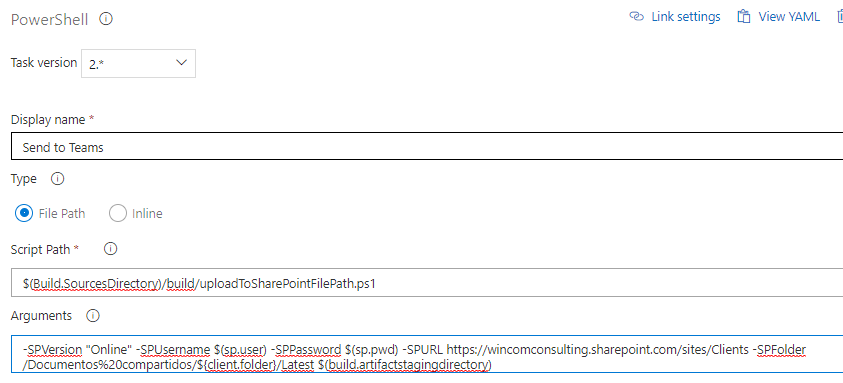
PowerShell
We will use this task to install the Microsoft SharePoint Libraries from the 'uploadToSharePointFilePath.ps1' located in the 'build' folder. It takes the following arguments:
-
-SPVersion: the version of Microsoft Sharepoint we want to use.
-
-SPUsername: the username.
-
-SPPassword: the password.
-
-SPURL: The URL pointing to Wincom's Sharepoint.
-
-SPFolder: The folder we want the '.wex' to be uploaded. Note: This value must be url-encoded.
-
-Folder: The folder that contains the '.wex' to be uploaded.
Using an existent pipeline in the organization:
-
Find the relevant client/product dedicated pipeline.
-
Make sure the project you're trying to build builds locally in your machine and it's checked in to the Version Control (GitHub/SVN) with the correct version (major, minor, beta, snapshot).
Note: It is recommended to understand the steps the pipeline will follow in order to build the extension and to know if it's necessary to specify a value in order to build correctly (this can be achieved by pressing the "Edit" button).
- Run the pipeline.
Note: There are differences to the pipeline's Build Tasks GUI.
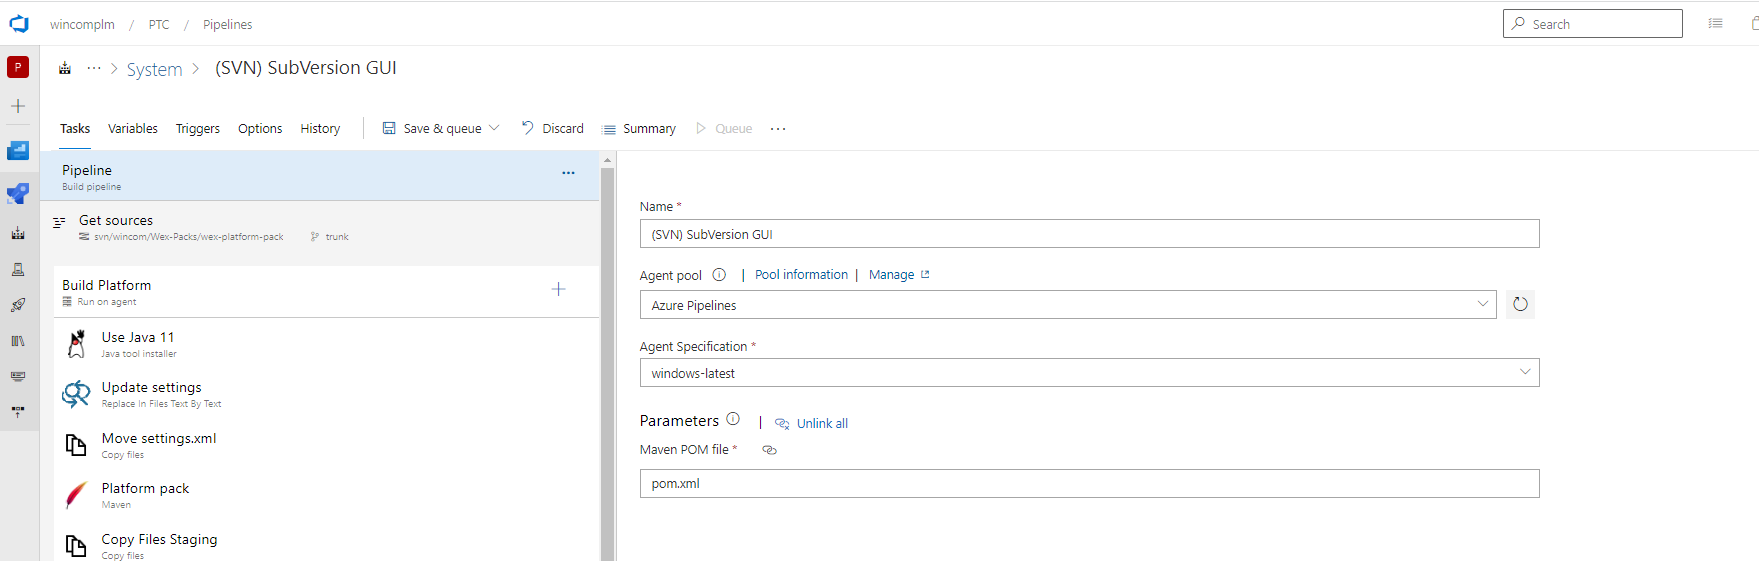
If the Version Control System used for checking out the code is Subversion, then you'll see something similar to this:
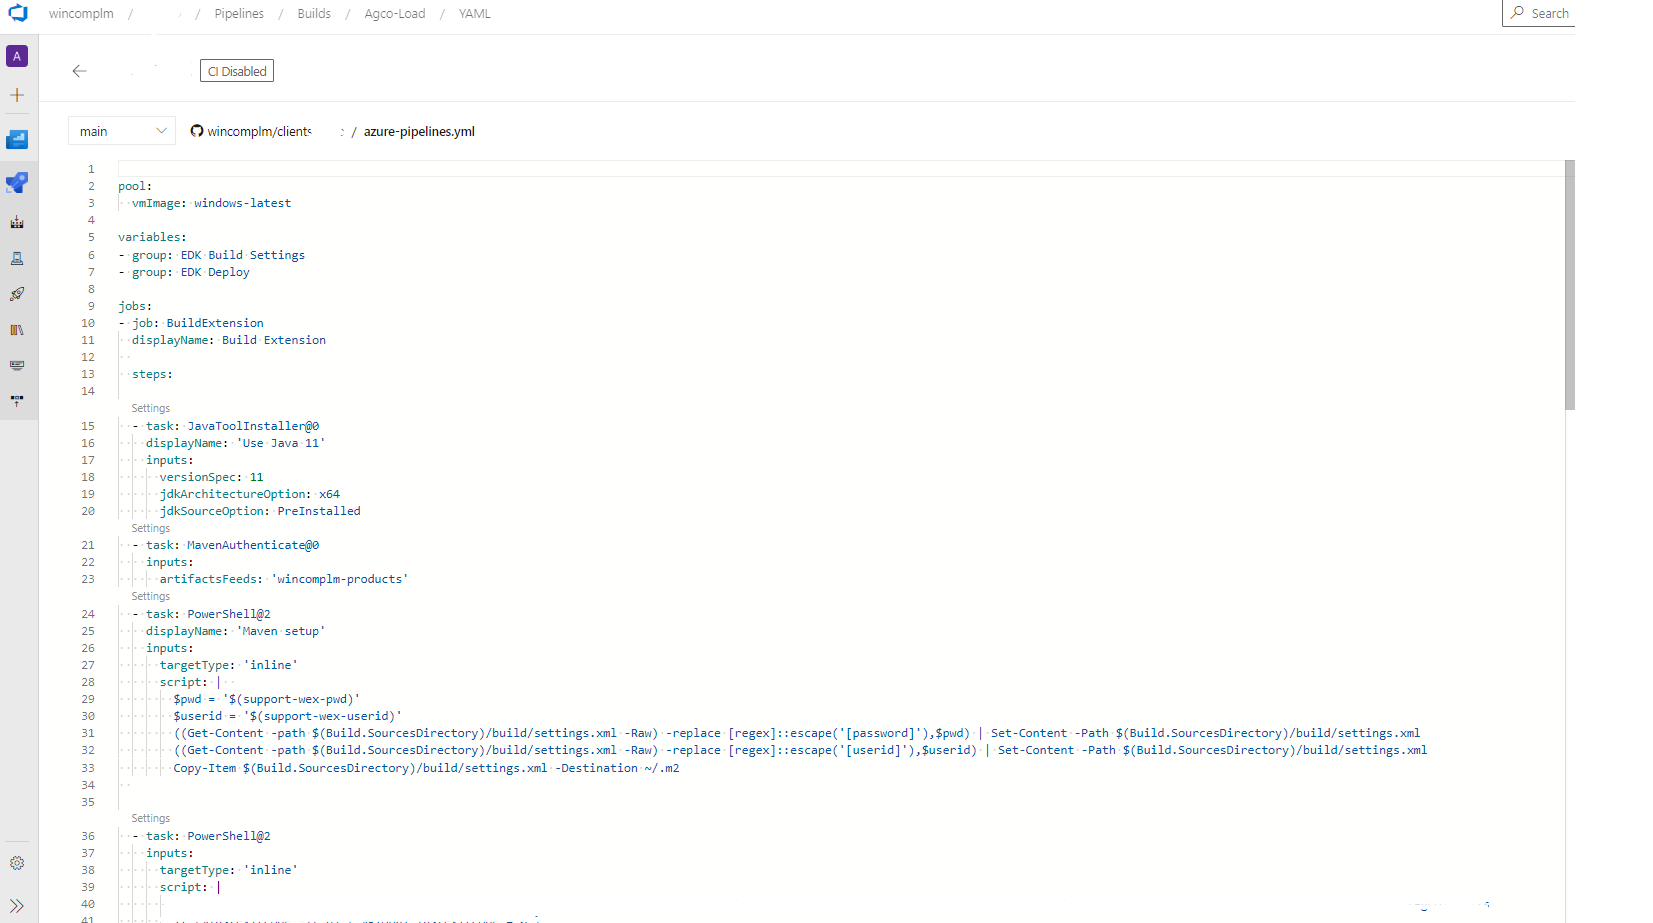
And if it's GitHub you'll see something similar to this:
Working with GitLab
What's GitLab?
GitLab is a web-based GIT repository that provides free open and private repositories. It is a complete DevOps platform that enables organizations to perform all the related tasks for the software products they develop.
What are GitLab CI/CD pipelines?
A tool for software development using the continuous methodologies [Integration, Delivery, Deployment].
For example, the GitLab CI/CD can be used to ensure that all the products to be delivered to customers are built using the latest version of the code checked-in into the preferred Version Control System (VCS), thus avoiding deliveries of local builds whose source code can be later lost or misplaced.
Create a project in GitLab:
In GitLab, you can create projects to host your codebase. You can also use projects to track issues, plan work, collaborate on code, and continuously build, test, and use built-in CI/CD to deploy your app.
GitLab Projects can be public or private repositories, a guide to change the visibility of a project can be found here.
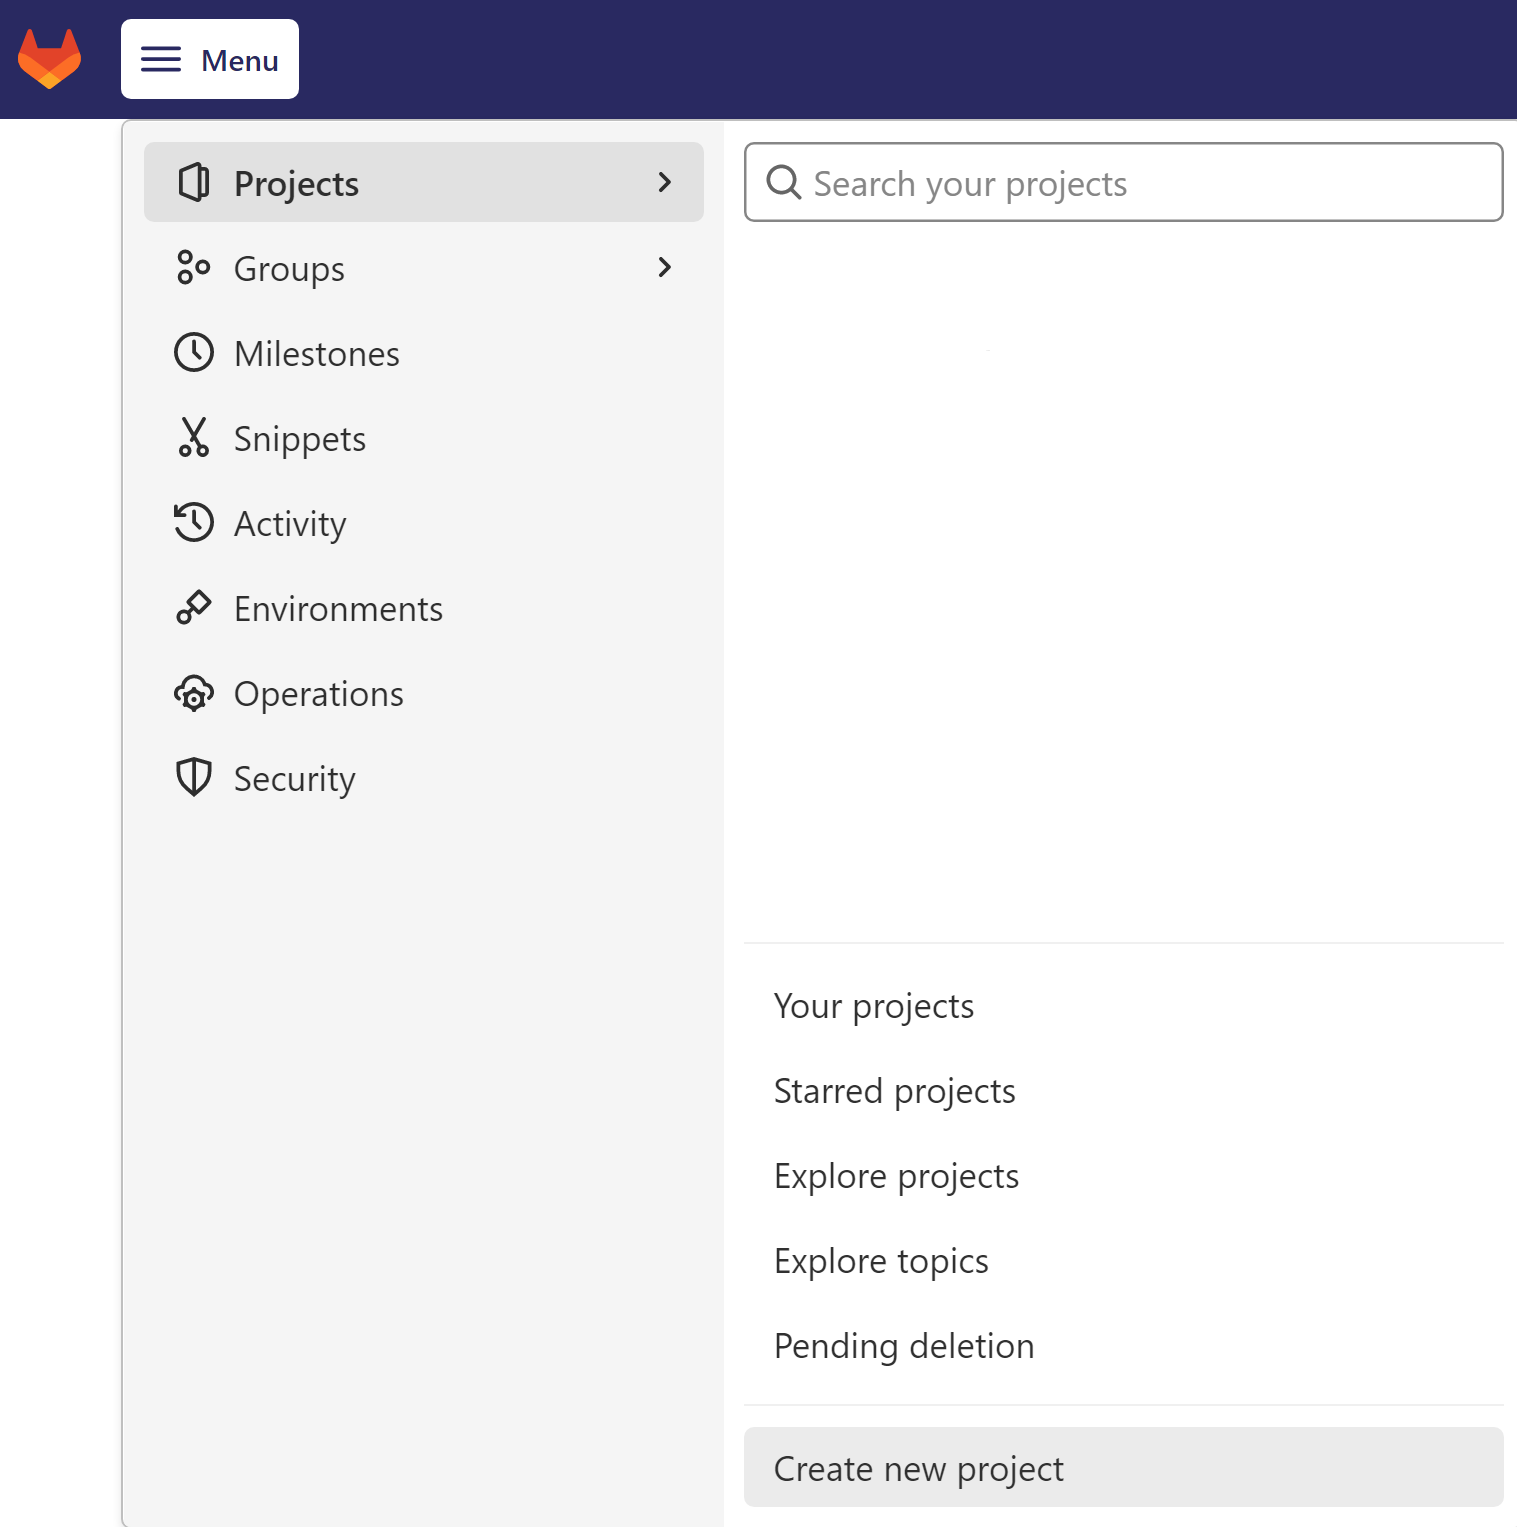
- On the top bar, select Menu > Project > Create new project.
-
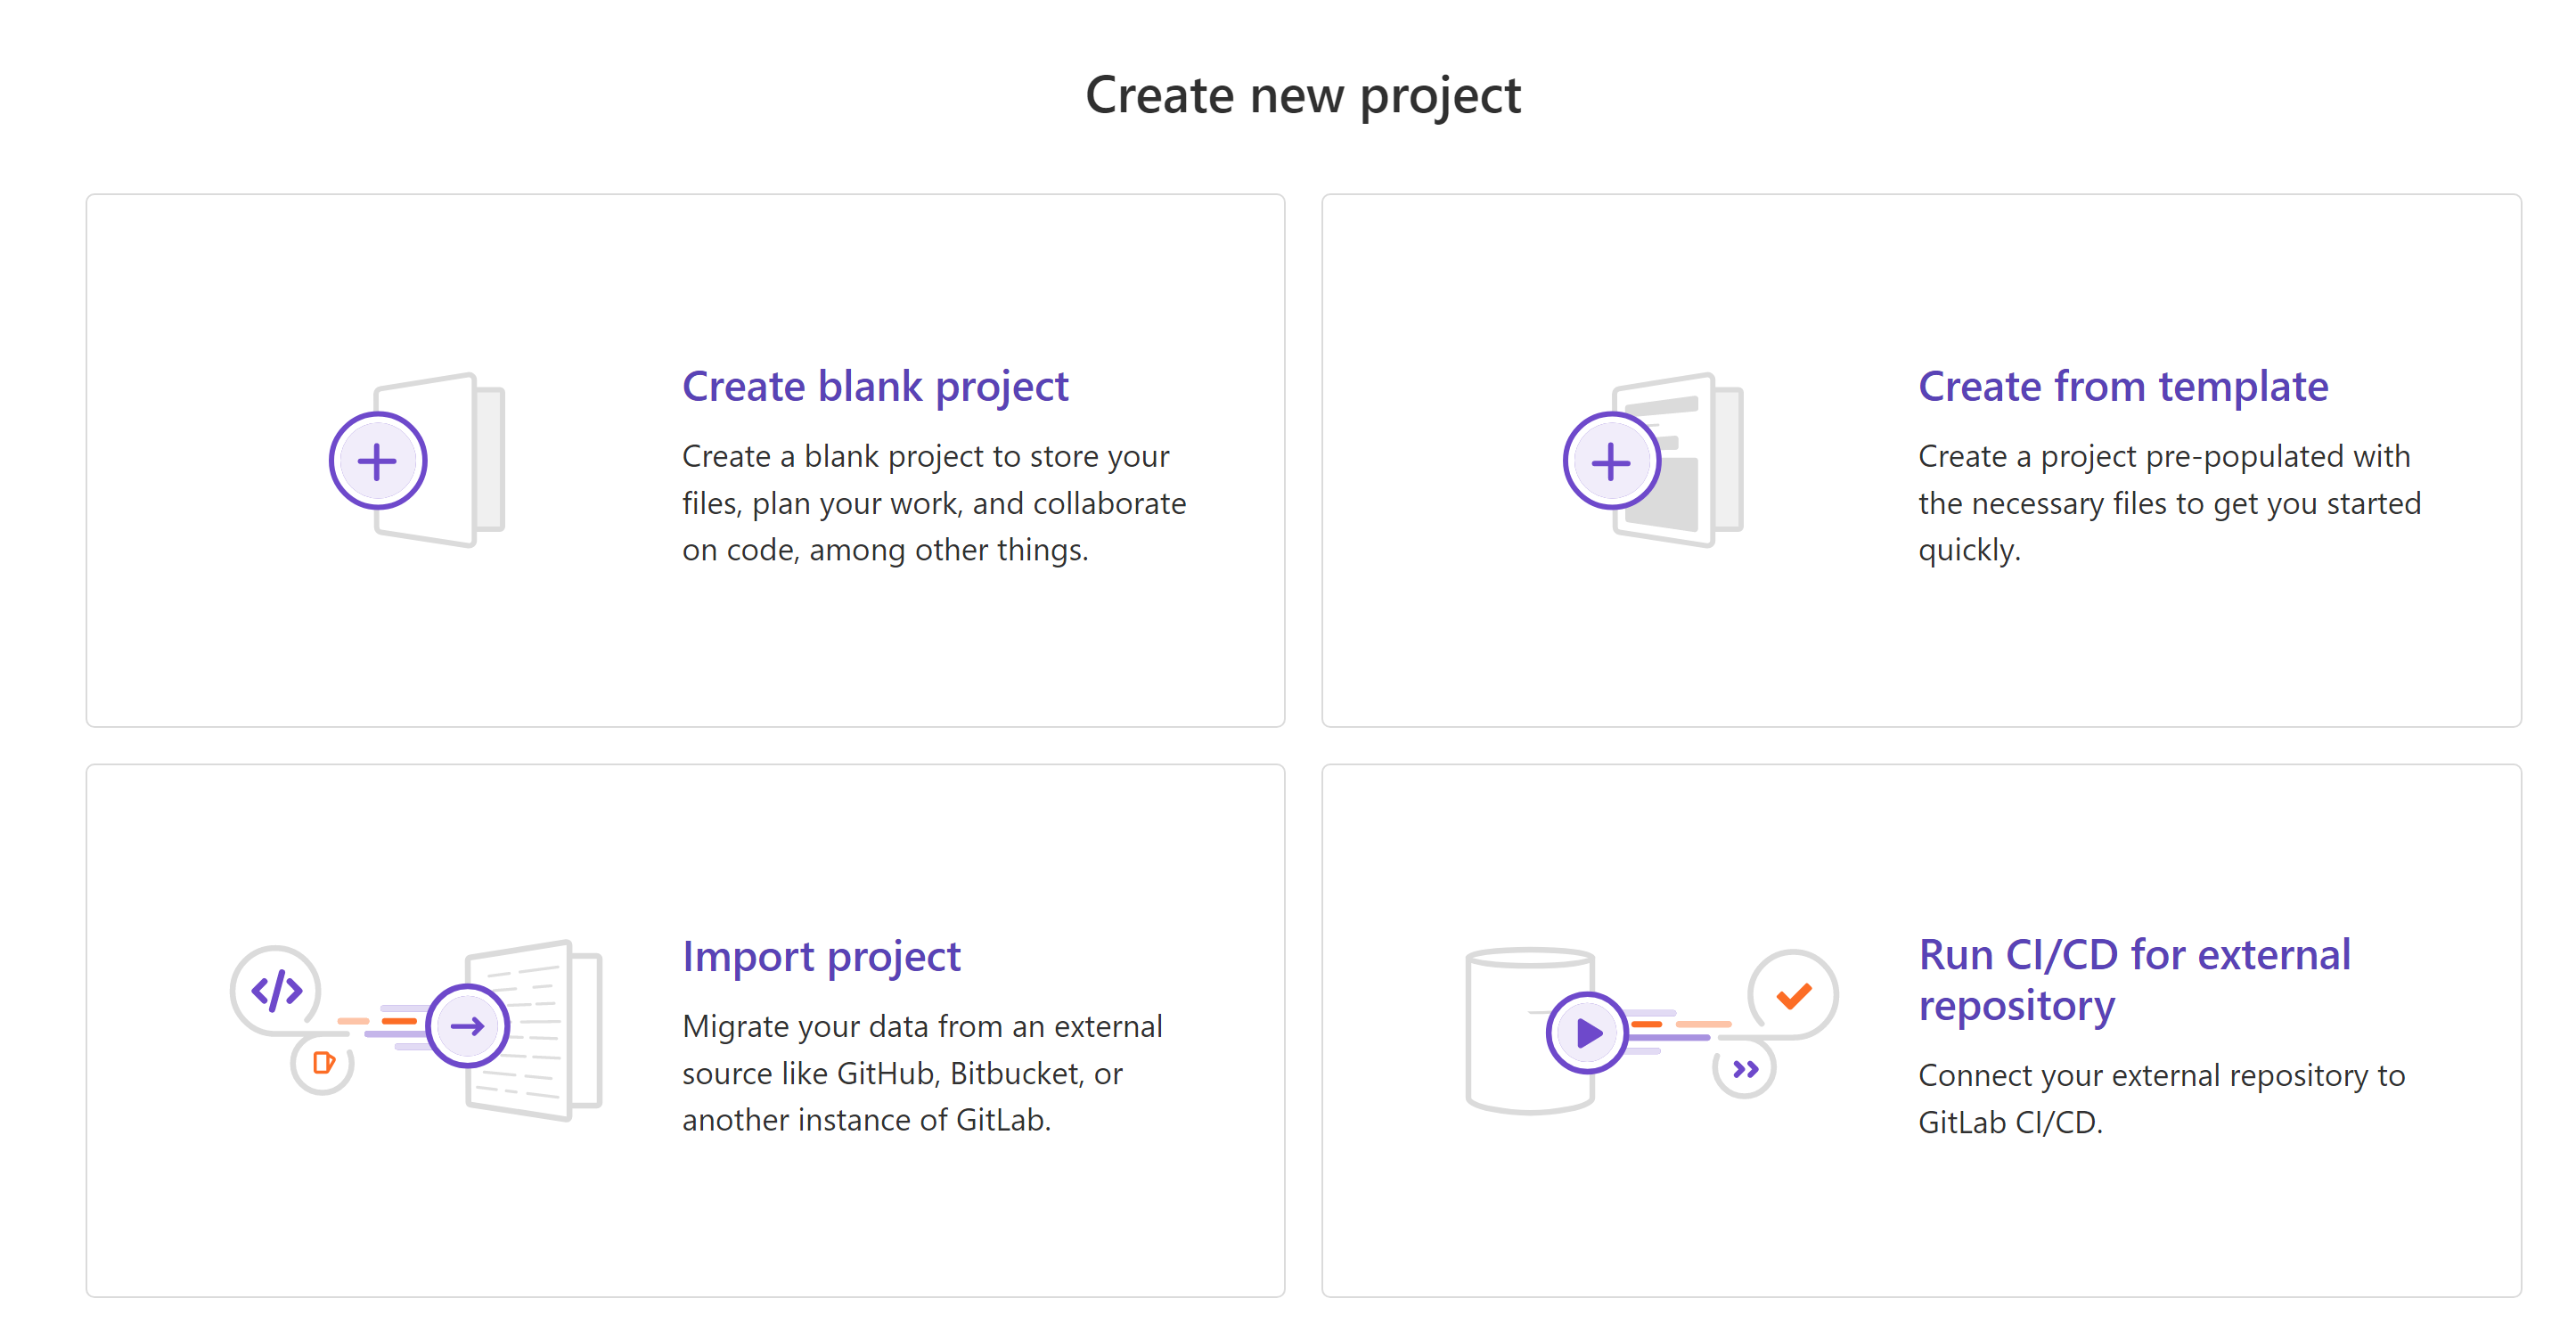
On the Create new project page, choose if you want to:
-
Create a blank project.
- Create a project from a:
- built-in template.
- custom template.
- HIPAA audit protocol template.
- Import a project from a different repository. Contact your GitLab administrator if this option is not available.
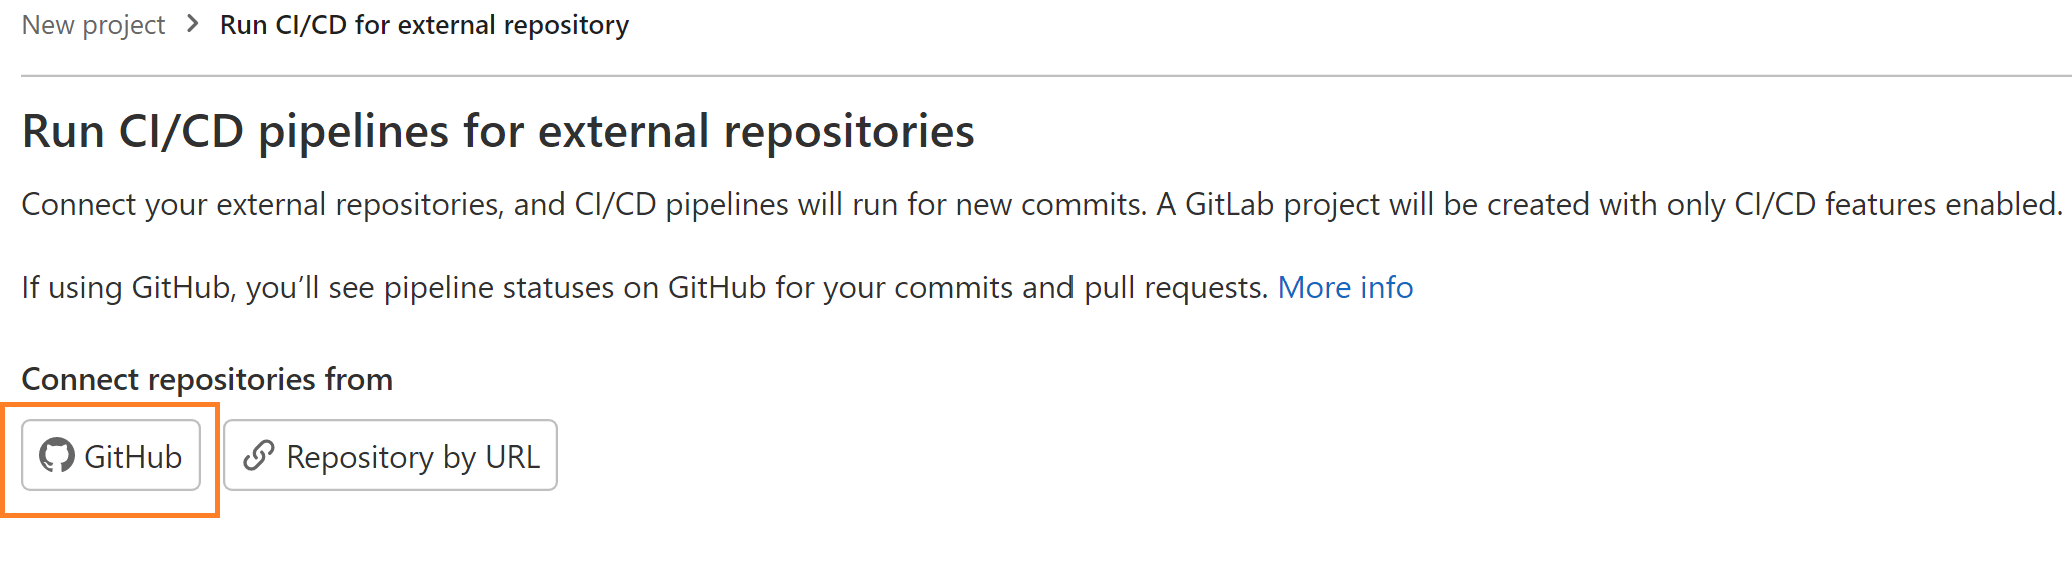
- Connect an external repository to GitLab CI/CD.
For this article we will connect to a Git Hub repository.
Before connecting with a github repository, you must create a personal access token. Once you have generated the token, you must go back to GitLab and click the 'GitHub' button at the Run CI/CD for external repository screen.
Connecting to a GitHub repository:
-
On the top menu, select Projects > Create new project.
-
Select Run CI/CD for external repository.
-
Select GitHub.
-
For Personal access token, paste the token.
-
Select List Repositories.
-
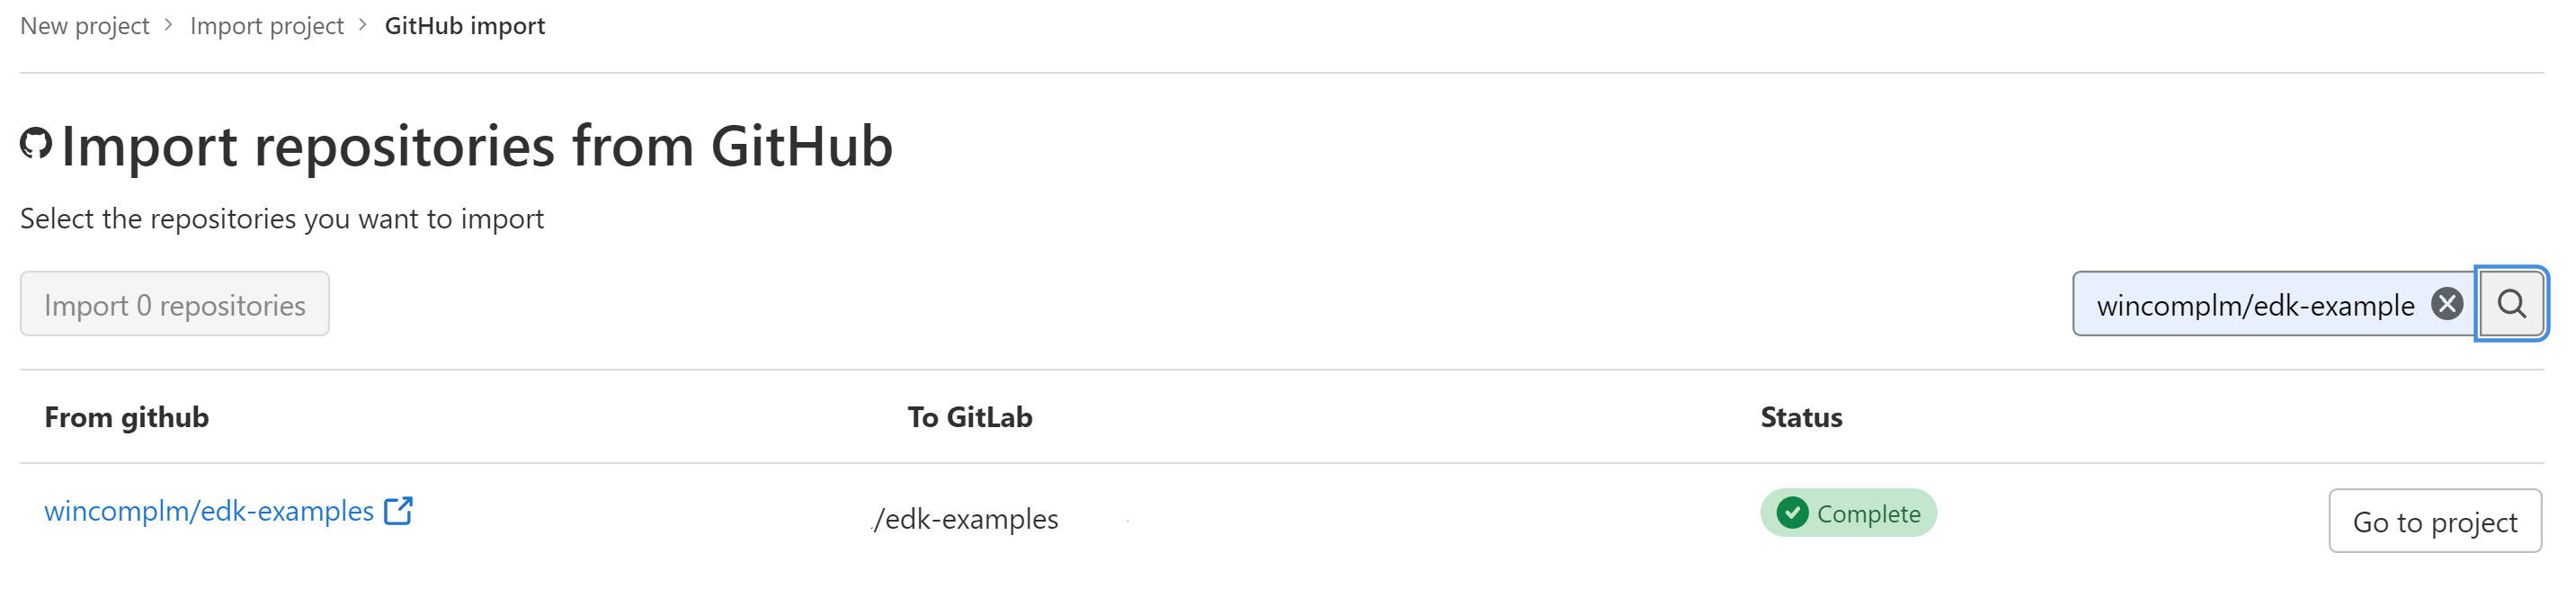
Select Connect to select the repository.
-
Click 'Go to project' button.
-
Go back to GitHub and add a file named
.gitlab-ci.ymlto the root of the project's repository, This file is where you define your CI/CD jobs, as a test for the runner or if it's the first time use the hello world example: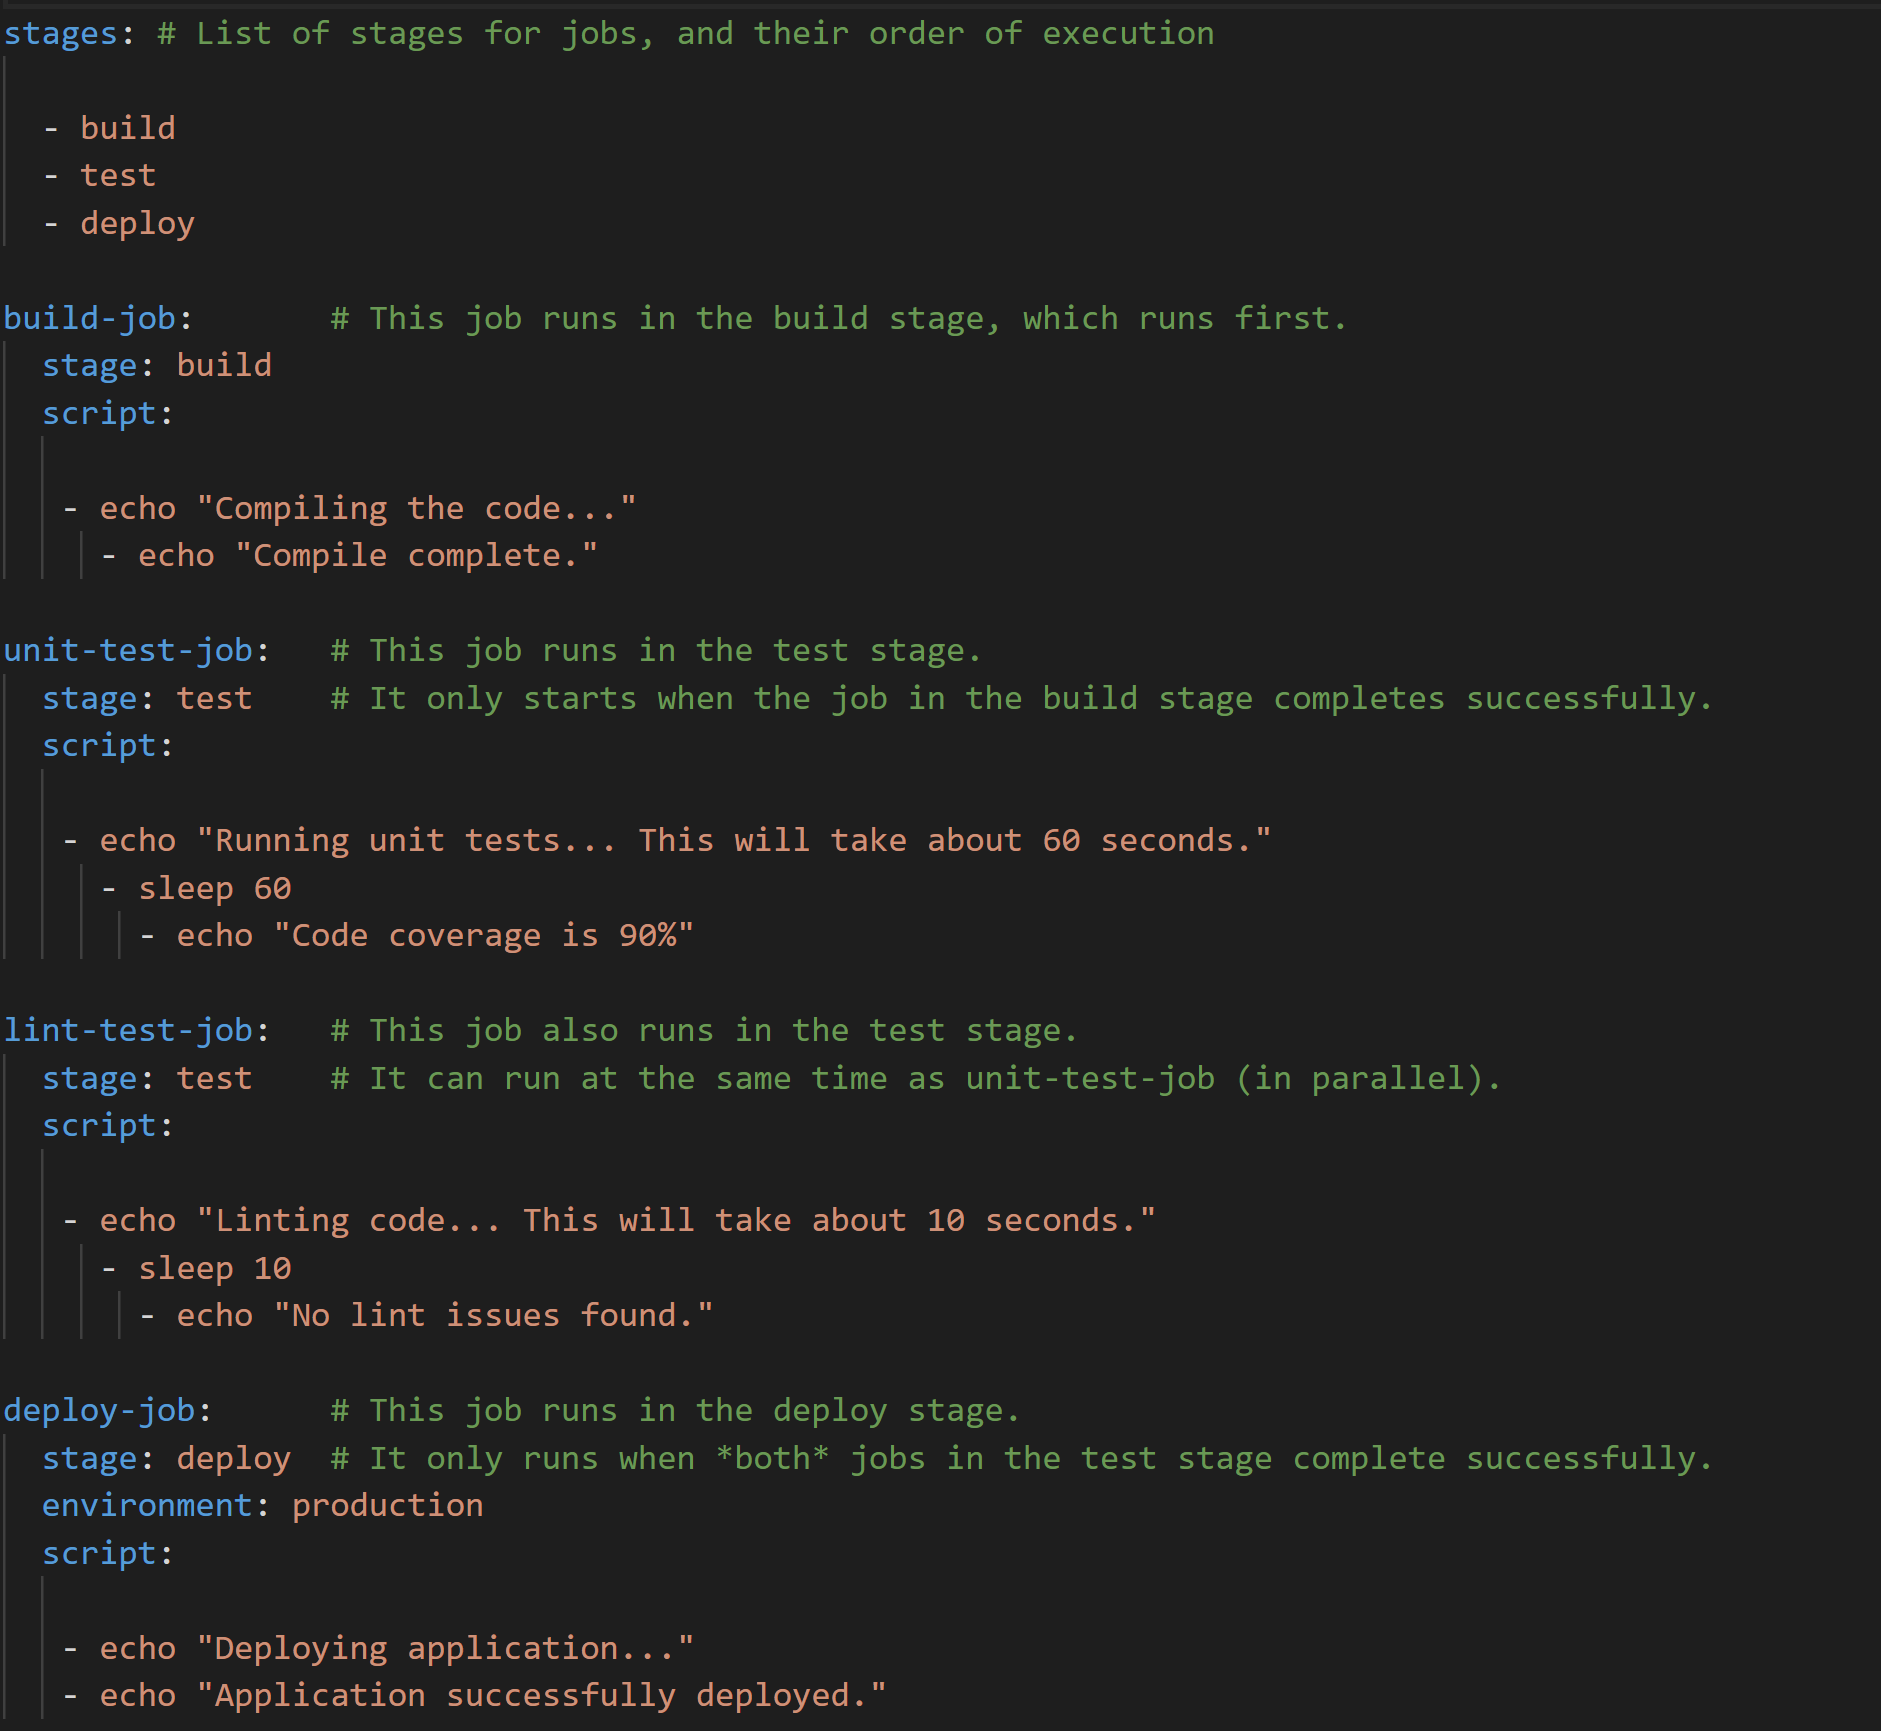
-
Create a GitLab Runner:
What is a GitLab Runner?
It's an application that works with GitLab CI/CD to run jobs in a pipeline. For this documentation a self-hosted GitLab Runner will be used, the instructions for installation and needed configurations the following:
Install a GitLab Runner:
-
Please refer to this link (for Windows).
-
(If not installed) Install GIT
-
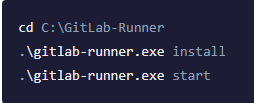
Create a folder in your system, example:
C:\GitLab-Runner. -
Download the binary for 64-bit or 32-bit depending on your system and once downloaded rename it to:
gitlab-runner.exe. -
Move the binary to your newly created folder
C:\GitLab-Runner. -
Make sure to restrict the
Writepermissions on the GitLab Runner directory and executable. If you do not set these permissions, regular users can replace the executable with their own and run arbitrary code with elevated privileges. -
Open as administrator a new command prompt.
-
You have two options for the installation of the GitLab Runner:
-
Run service using Built-in System Account
- Run service using user account
For this Article we will be using the Built-in System Account option:
Note: In case you face any problem during the install phase, please see this link.
-
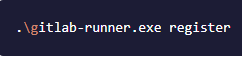
Register a Git-Lab Runner
-

-
Open a command prompt (no need to run as administrator).
-
Run the following command:
You'll be asked to enter the following:
-
Git Lab Instance.
-
Registration token.
To get this two parameters go to you GitLab profile, click Settings -> CI/CD -> Runners ->
 -> Specific runners
-
Description for the runner.
-
Tags for the runner. [GitLab tags documentation]
-
Maintenance notes.
-
Executor for the pipeline. [GitLab executors documentation]
-
Once you've entered the requested information, you'll receive a message similar to:

Later on you can edit or remove your registered runners from the Web UI at your profile in https://gitlab.com/.
-
If all the runner configurations where done correctly you'll have this output:
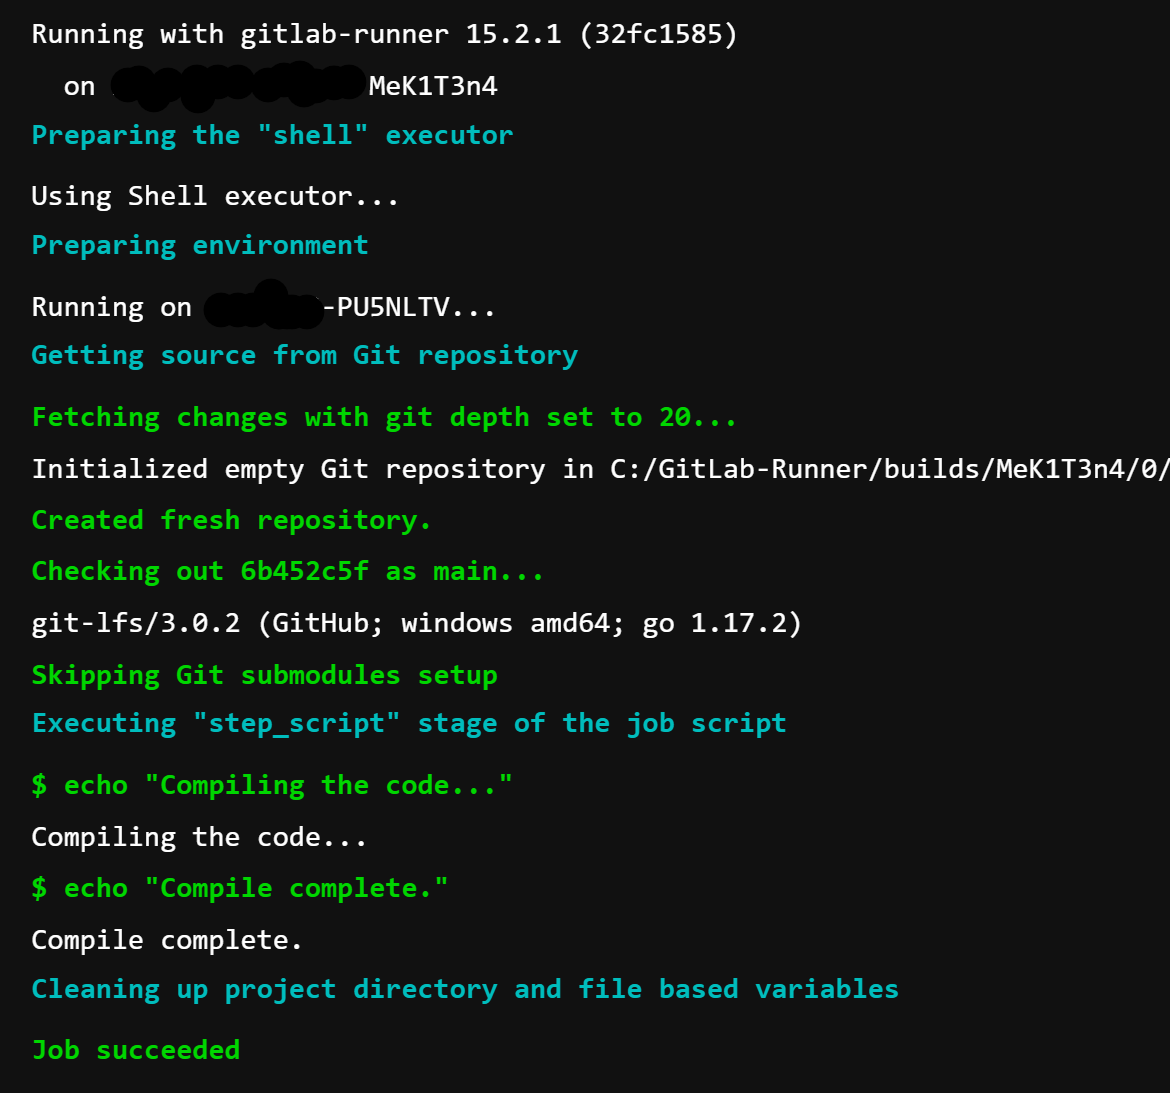
And you can carry on editing the .gitlab-ci.yml, to execute the jobs needed for building the project.
(if using a self-hosted runner make sure GIT, JAVA and Maven are installed and environment variables are properly set on the runner's machine).