Example 1: Hello World
-
What will we do? - Create our first Windchill extension
-
What do you need? - Site access to a non-production Windchill
-
How long will it take - 15 minutes
Overview
During the course of this example you'll build and deploy your first Windchill Extension, which will add a menu entry to the Quick Links dropdown of the Windchill UI. Its main goal is to get you acquainted with the building and deployment processes, and also to help you set your system up for the developing of Windchill Extensions.
You can find the example's code in our GitHub repository.
If you are unfamiliar with the key concepts of the EDK you can watch this video, which will give you an introduction. All of the technical and theoretical aspects of the Extension Framework are documented in our Developer Guide.
Prerequisites
The exercises are deployed and executed on any Windchill system , they will be signed as a trial for 30 days. Also, any OS can be used to develop Windchill Extensions: it does not need to match the target Windchill.
Required
- Site access to a non-production Windchill (or Wex Admin access)
Wincom's Maven Repository
Our online Maven Repository holds all the code required to build Windchill Extensions. To connect to it, you will need to register an account at https://www.wex.solutions . Once that is done, check if your login gives you access to the repository.

In order to allow Maven to automatically download the dependencies from the repository when building a project, the following .xml file has to be placed and filled with your credentials at C:\Users\{username}\.m2\settings.xml:
<settings>
    <servers>
        <server>
            <id>sign.wex.solutions</id>
            <username><!-- email --></username>
            <password><!-- password --></password>
        </server>
        <server>
            <id>WINCOM-RELEASES-REPO</id>
            <username><!-- email --></username>
            <password><!-- password --></password>
        </server>
        <server>
            <id>WINCOM-WINDCHILL-REPO</id>
            <username><!-- email --></username>
            <password><!-- password --></password>
        </server>
    </servers>
    <profiles>
        <profile>
            <id>default</id>
            <repositories>
                <repository>
                    <id>WINCOM-RELEASES-REPO</id>
                    <url>https://nexus.wex.solutions/repository/windchill/</url>
                    <layout>default</layout>
                </repository>

                <repository>
                    <id>WINCOM-WINDCHILL-REPO</id>
                    <url>https://nexus.wex.solutions/repository/releases/</url>
                    <layout>default</layout>
                </repository>
            </repositories>
            <pluginRepositories>
                <pluginRepository>
                    <id>WINCOM-RELEASES-REPO</id>
                    <url>https://nexus.wex.solutions/repository/releases/</url>
                    <layout>default</layout>
                    <releases>
                        <enabled>true</enabled>
                        <updatePolicy>always</updatePolicy>
                    </releases>
                    <snapshots>
                        <enabled>false</enabled>
                    </snapshots>
                </pluginRepository>
            </pluginRepositories>
        </profile>
    </profiles>
    <activeProfiles>
        <activeProfile>default</activeProfile>
    </activeProfiles>
</settings>
Online Windchill Test System
Setting Up Your Environment
In this example, and the ones that follow it, the following tools are used:
Install Java 11
If you do not have Java 11 on your system, you can download it here (it is free for development purposes). OpenJDK is an open-source alternative to it which you can use if preferred.
Install an IDE e.g. NetBeans
The UI you will see in a lot of the following examples belongs to Apache NetBeans, a free Integrated Development Environment (IDE) which you can download, but any IDE that supports Java and Maven will be suitable for following this guide.
Building the Extension
Open NetBeans and the downloaded Hello World extension as a Maven Project. The Hello World project is ready to be built out of the box: in order to do so, click the Clean and Build icon on the interface or press Shift+F11:
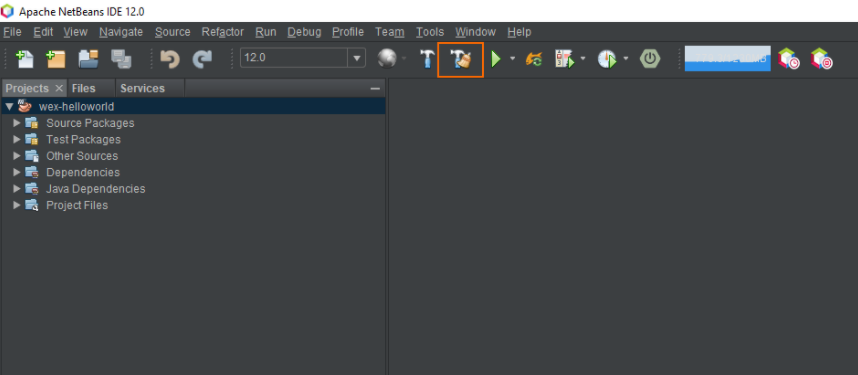
(Make sure before building that there is a 12.0 (or the Windchill version you have) at the left of the Clean and Build icon, if you can't select a version, build it once and then you should be able to select a version.)
If the setting of the connection with the Wincom's Maven Repository was done properly, the necessary dependencies for building the project will be automatically downloaded. The files will be stored in your local repository (C:\Users\{username}\.m2) for future usage, which will make the following building processes faster.
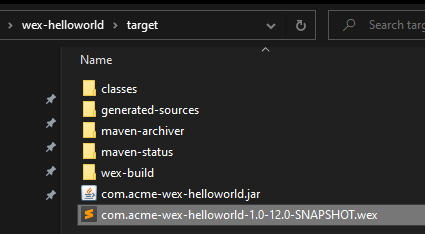
Once the building process is completed, a target folder will appear in your project. Among other things, it will contain a .wex file, which is the one that constitutes the Windchill Extension and will be deployed on your Windchill server.
Troubleshooting
If while building you get this error "Unable to make protected final java.lang.Class java.lang.ClassLoader.defineClass(java.lang.String,byte[],int,int) throws java.lang.ClassFormatError accessible: module java.base does not "opens java.lang" to unnamed module @7307ae6"
Follow this steps:
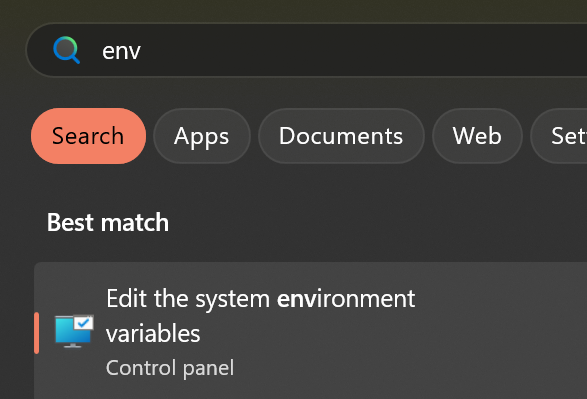
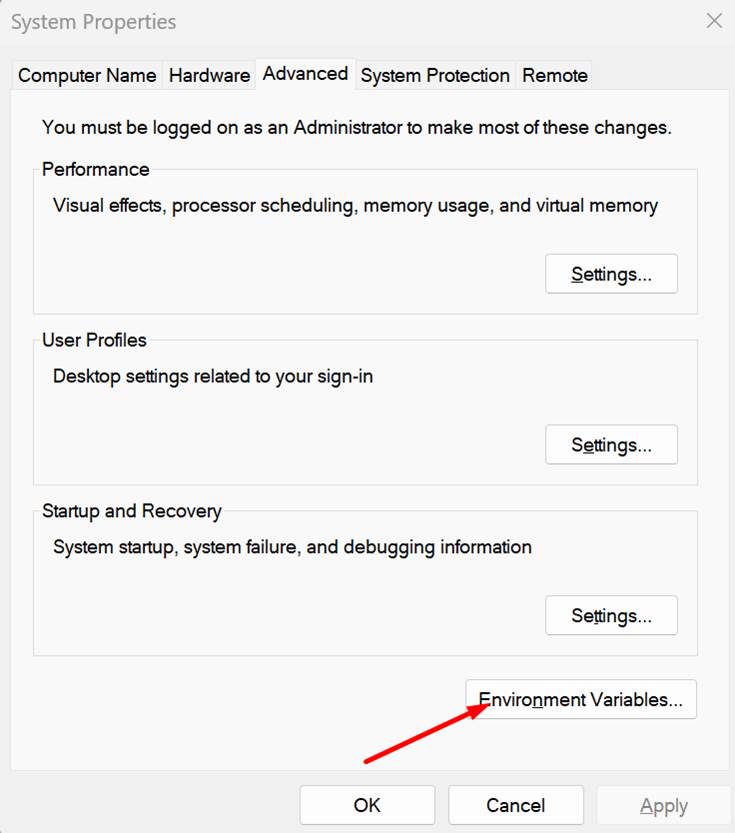
Go to system enviroment variables:
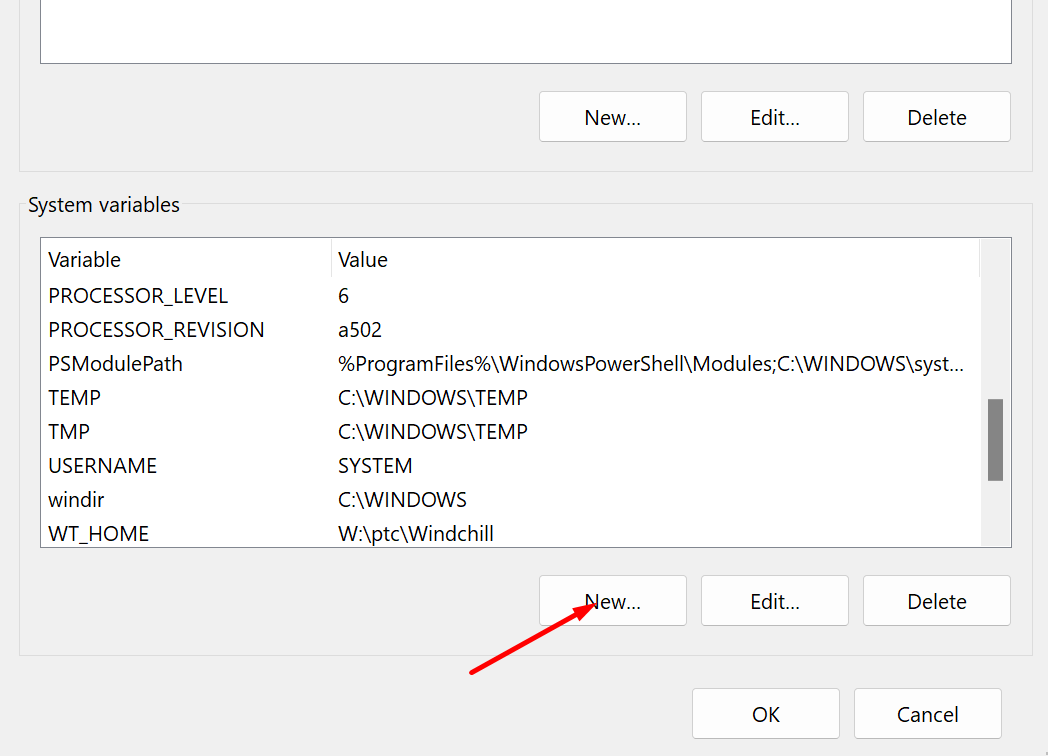
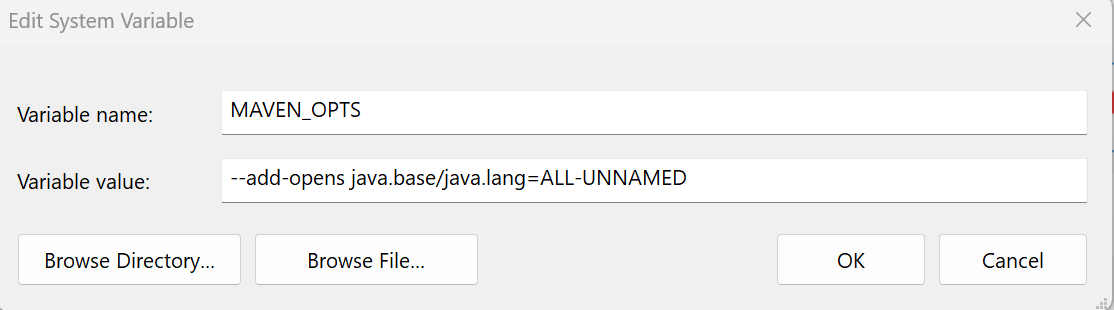
Add "MAVEN_OPTS "as a system variable with value “--add-opens java.base/java.lang=ALL-UNNAMED”
Remember to restart NetBeans after updating the env variable.
Deploying the Extension
Now that the extension has been built it is signed and ready to use, you can install it on any non-production system
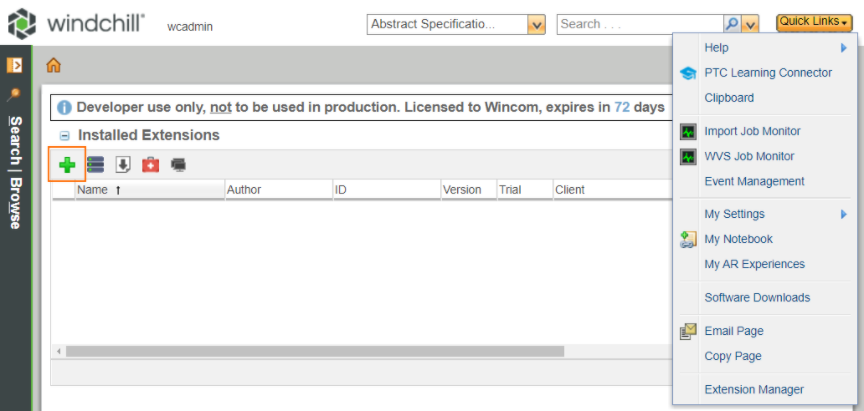
Testing the Extension
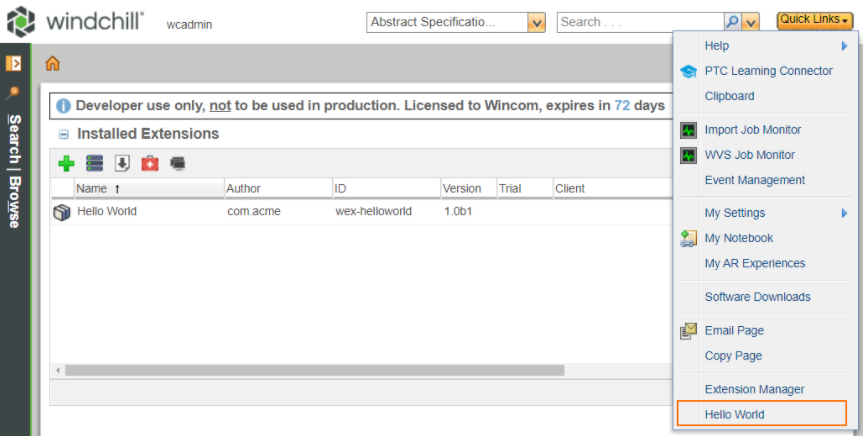
After you refresh the page, a new menu entry will appear under the Quick Links dropdown.