Example 7: UI
-
What will we do? - Learn how do the UI are made, how to implement them inside Windchill , how standalone UI can be made and how to automate the verification of UI
-
What do you need? - Site access to a non-production Windchill
-
How long will it take - 20 minutes
This example illustrates how to add an entry to a Windchill object's Actions dropdown menu, and also how to create a standalone interface hosted in Windchill. It will also introduce the concept of testing a UI through jUnit in a fully automated way.
You can find the code for this example in our GitHub repository.
Make sure you check out the UI section in our Developer Guide if you want to get to know more about Windchill UIs.
Windchill UI
This section of the example will teach you how to add an entry to a Windchill Part's Actions menu. It also contains the implementation of a Validator, which regulates that said entry only appears for administrators, and teaches how to localize the entry's text so it's displayed in the browser's language.
Implementation
The menu and tab entry is added using the <install> section of the definition.xml file:
    <install>
        <menus>
            <extension menu="more parts actions" file="PartClient-actionmodels" action="action-methods.example-command" position="SETSTATE"/>
            <extension menu="header actions" file="navigation-actionModels" action="exampleManager"/>
            <extension menu="relatedItems" file="infoPage-actionmodels" action="tabExample"/>
        </menus>
        <actions>
            <command class="com.wincomplm.wex.kernel.impl.actions.WexActionMethods" method="execute" name="action-methods.example-command"  shortcut="false"/>
            <page name="exampleManager"   url="manager2.jsp"/>
            <page name="tabExample" url="tabExample.jsp"/>
        </actions>
    </install>
Resources
The actions must have an associated resource, which in our example can be found at com.wincomplm.wex.example.ui.resources.WexResources, tagged with the following annotations:
@WexComponent(uid = "com.wincomplm.wex.example.ui.resources.WexResources", description = "Resource bundle")
@RBUUID("com.wincomplm.wex.example.ui.resources.WexResources")
@RBNameException
Localization
The localized version of the resources will have an additional annotation, @WexLocale, which takes its target language as a paramater. An example would look like:
@WexComponent(uid = "com.wincomplm.wex.example.ui.resources.WexResources", description = "Resource bundle")
@RBUUID("com.wincomplm.wex.example.ui.resources.WexResources")
@WexLocale(WexLanguage.FRENCH)
@RBNameException
public class WexResources_fr extends WTListResourceBundle {
Regulating Access With a Validator
A validator is called whenever the menu is displayed in order to display it or not for the user accessing it. For this reason it needs to be fast (ideally <50ms) but it can include a simple query or API usage in order to check the user's access.
The validator does not control security, only visibility: the user could still manually type the URL and access it without having to interact with the menu. For securing the page, check out the section below.
The validator is implemented through the declaration of a feature, using the @WexComponent tag, with a @WexValidator annotation on top of it, declaring the feature a validator and taking as parameters the internal names of the menu entries it is meant to validate for. The class acting as a validator must extend DefaultUIComponentValidator; the example is using a WEX Framework class that validates that the user is an administrator.
@WexValidator({"edkHelloWorld","edkHelloWorldNonPop"})
@WexComponent(uid = "wex-example-ui.validator", description = "Menu validator")
public class WexMenuAdminUIValidator extends WexAdminUIValidator
Execution
First, try accessing the menu entry we added to the WTPart's Actions dropdown by the deployed example extension as an administrator . It should display normally, since the user trying to access them is in the group allowed by the validator we implemented earlier.

Note that the position is after the Set State entry.
Now, use your browser incognito mode and log in as a normal user: the menu entry will not appear, as the Validator is preventing that from happening.
If you try accessing the menus with a browser configured in French, the language will automatically change due to the localized resources we implemented before.
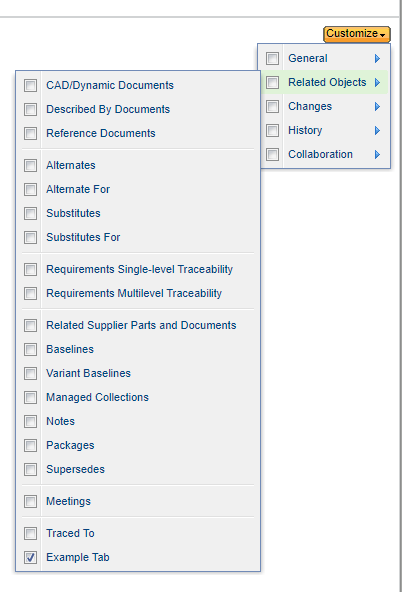
Tab
The tab appears in the customize menu
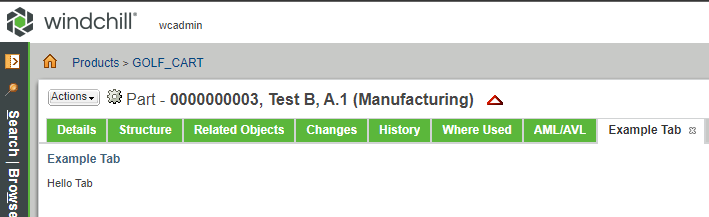
And the tab executes as follows
Standalone UI
A standalone UI doesn't need to use any Windchill UI components and can look completely different, but it is still hosted in Windchill and requires no external server or resources.
Implementation
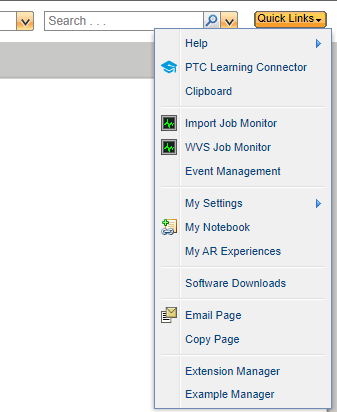
A new menu entry has been added to quick links
The implementation uses JSP, and within them the developer can use whatever UI technology they desire. In this case, we have used Bootstrap to create a simple page with a button.
The page is launched with a simple redirect script from a Quick Links menu. This type of interface uses its own set of libraries and cannot be hosted in a Windchill page.

It can interact with Windchill using a REST interface. However, as these are all hosted on the same codebase, it is often easier to implement a simple JSON JSP to access the required data.
JSP Bean
A bean is a JSP technique to use a class to provide data to the page

This is declared in the code
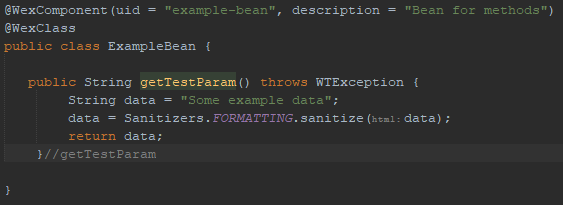
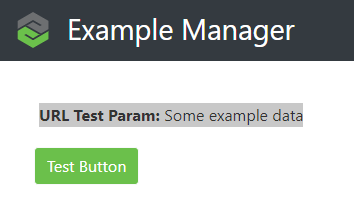
and used as follows

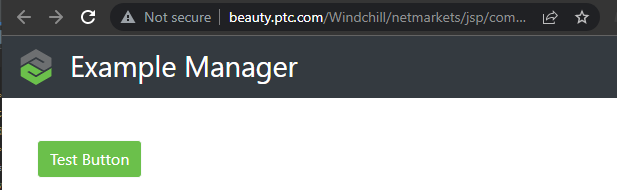
Which creates this page
URL Uniqueness
As with many UIs, and especially with a page that can be updated frequently, there is always a problem that the users browser cache will cause the pages not to update for a user that has visited the application before the update. To avoid this, a unique key can be generated during build to give a new unique signature to the URL so the browser detects it as a new resource and doesn't cache it. A Maven Plugin is used to update the file:
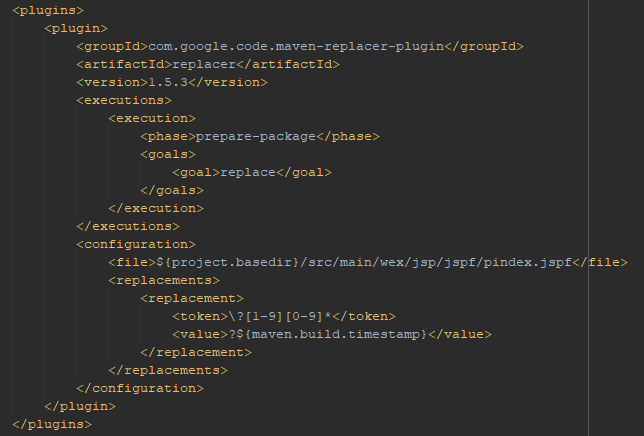
This can be used to create a new index:

Which can be appended to the generated URL in the following way:

Execution
After deploying the WEX generated when building the example's project, the page will be accessible from the Quick Links menu:

Testing
A testing version of the code can be built, that can use Selenium, if the example's project is built with the following option present in the Maven arguments:
-Dwex.junit.exclude=none
The code will include a reference to wex-junit, which is available here. The code has included the following files to execute the test:
junit.jsp

JUnitTestLauncher.java
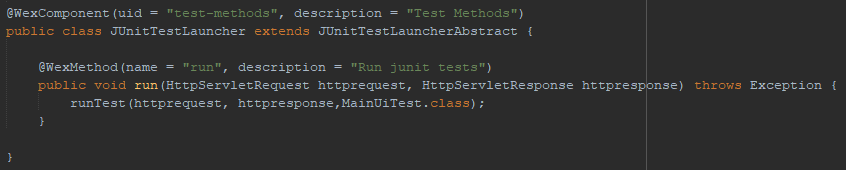
MainUiTest.java
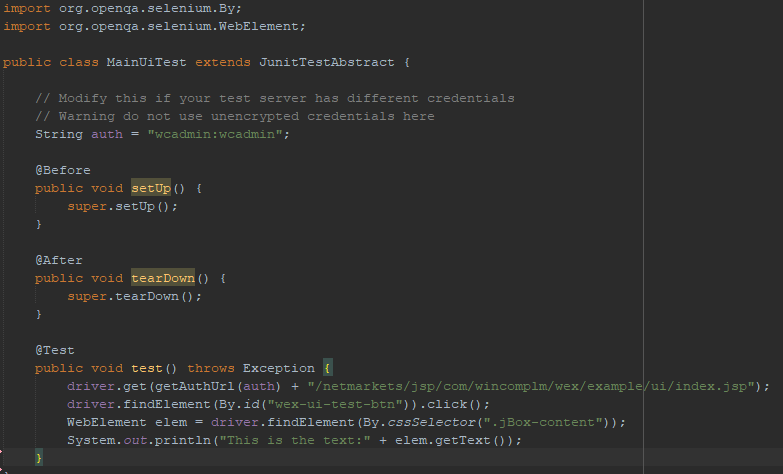
Test Execution
By visiting the JSP, the test will be triggered:

Note that the pretty parameter is only to render the output in a human readable form. During the automatic test, the UI was opened and the button clicked as you can see in the MS logs:
